As an avid user of Visual Composer, I have experienced firsthand the power and flexibility it offers in building websites.
Recently, I discovered that Visual Composer popups can greatly enhance website performance by growing email lists, improving click-through rates, and reengaging visitors on the verge of leaving.
In this blog post, we will explore two popular methods of creating Visual Composer Popups – using Visual Composer’s built-in popup builder and using Picreel. I will also share my personal recommendation based on the comparison between the two.
Here’s how my popup created with Picreel looks in Visual Composer:

Before we look at the two methods, let’s quickly understand the differences between Visual Composer’s built-in popup builder and Picreel:
| Criteria | Visual Composer’s Built-in Popup Builder | Picreel |
|---|---|---|
| Multi-platform support | ❌ Works exclusively with Visual Composer, limiting its usage to WordPress websites with a premium Visual Composer subscription | ✅ Works across multiple platforms, including WordPress, Shopify, Magento, and more, providing flexibility for users with different website platforms |
| Features | ✅ Offers essential features, such as design templates, content elements, and triggers | ✅ A wide range of advanced features, such as A/B testing, exit intent triggers, on-site retargeting, and customizable offers based on user behavior |
| Targeting | ✅Provides various targeting options, such as on-page load, exit-intent, on-click, and element ID. | ✅Advanced targeting options, including exit intent triggers, geo-targeting, behavior-based triggers, and personalized offers based on user browsing history, allowing for precise audience targeting. |
| Behavior tracking | ❌No behavior tracking capabilities. | ✅Offers behavior tracking tools to gather data on user interactions, enabling personalized offers and improved targeting. |
| A/B Testing | ❌No A/B testing functionality. | ✅Includes A/B testing features to experiment with different popup designs, layouts, and offers to optimize conversion rates. |
While both Visual Composer popup builders offer good functionality, I recommend using Picreel for creating popups based on my experience. Here’s why:
- More Features: Compared to Visual Composer’s limited features, Picreel provides a wide range of advanced popup options, allowing you to create compelling and interactive Visual Composer popups that capture your visitors’ attention.
- Advanced Targeting Options: It offers advanced targeting and segmentation features, allowing you to display popups to specific audience segments based on their behavior, demographics, and preferences.
- Better Customization: With Picreel, you have extensive customization capabilities, enabling you to design Visual Composer popups that align with your brand’s aesthetics and messaging.
Now let’s learn how to create and add a popup in Visual Composer.
Method 1: Using Visual Composer’s Built-In Popup Builder:
Visual Composer offers a built-in popup tool. However, to create a popup, you need to have a premium license of Visual Composer and download the Popup Builder add-on.
Here are the steps:
1. Go to your WordPress dashboard and click “Visual Composer Hub” in the Visual Composer menu.

2. Next, navigate to “Addons” and download the “Popup Builder” add-on.
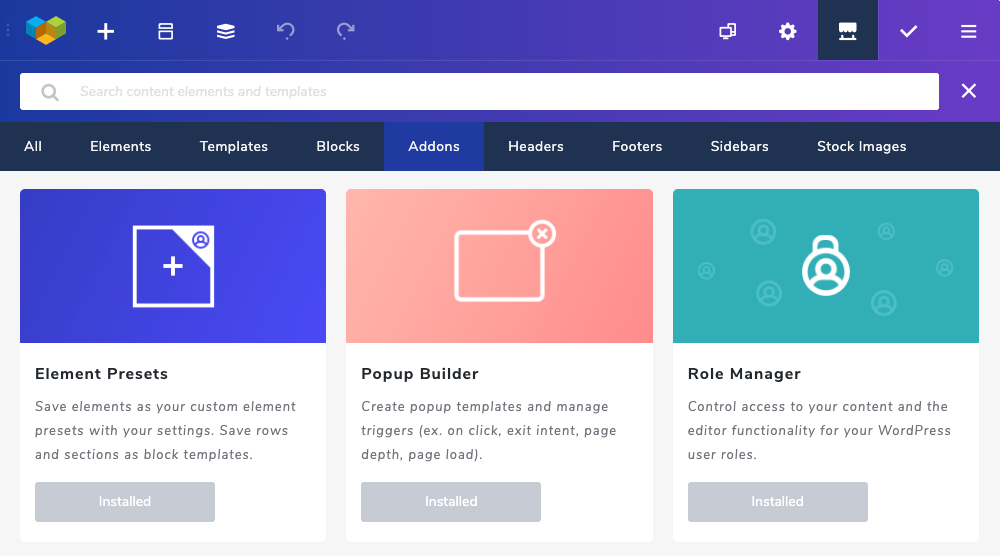
3. To access the Popup Builder editor, find and click “Popup Builder” in the Visual Composer menu.
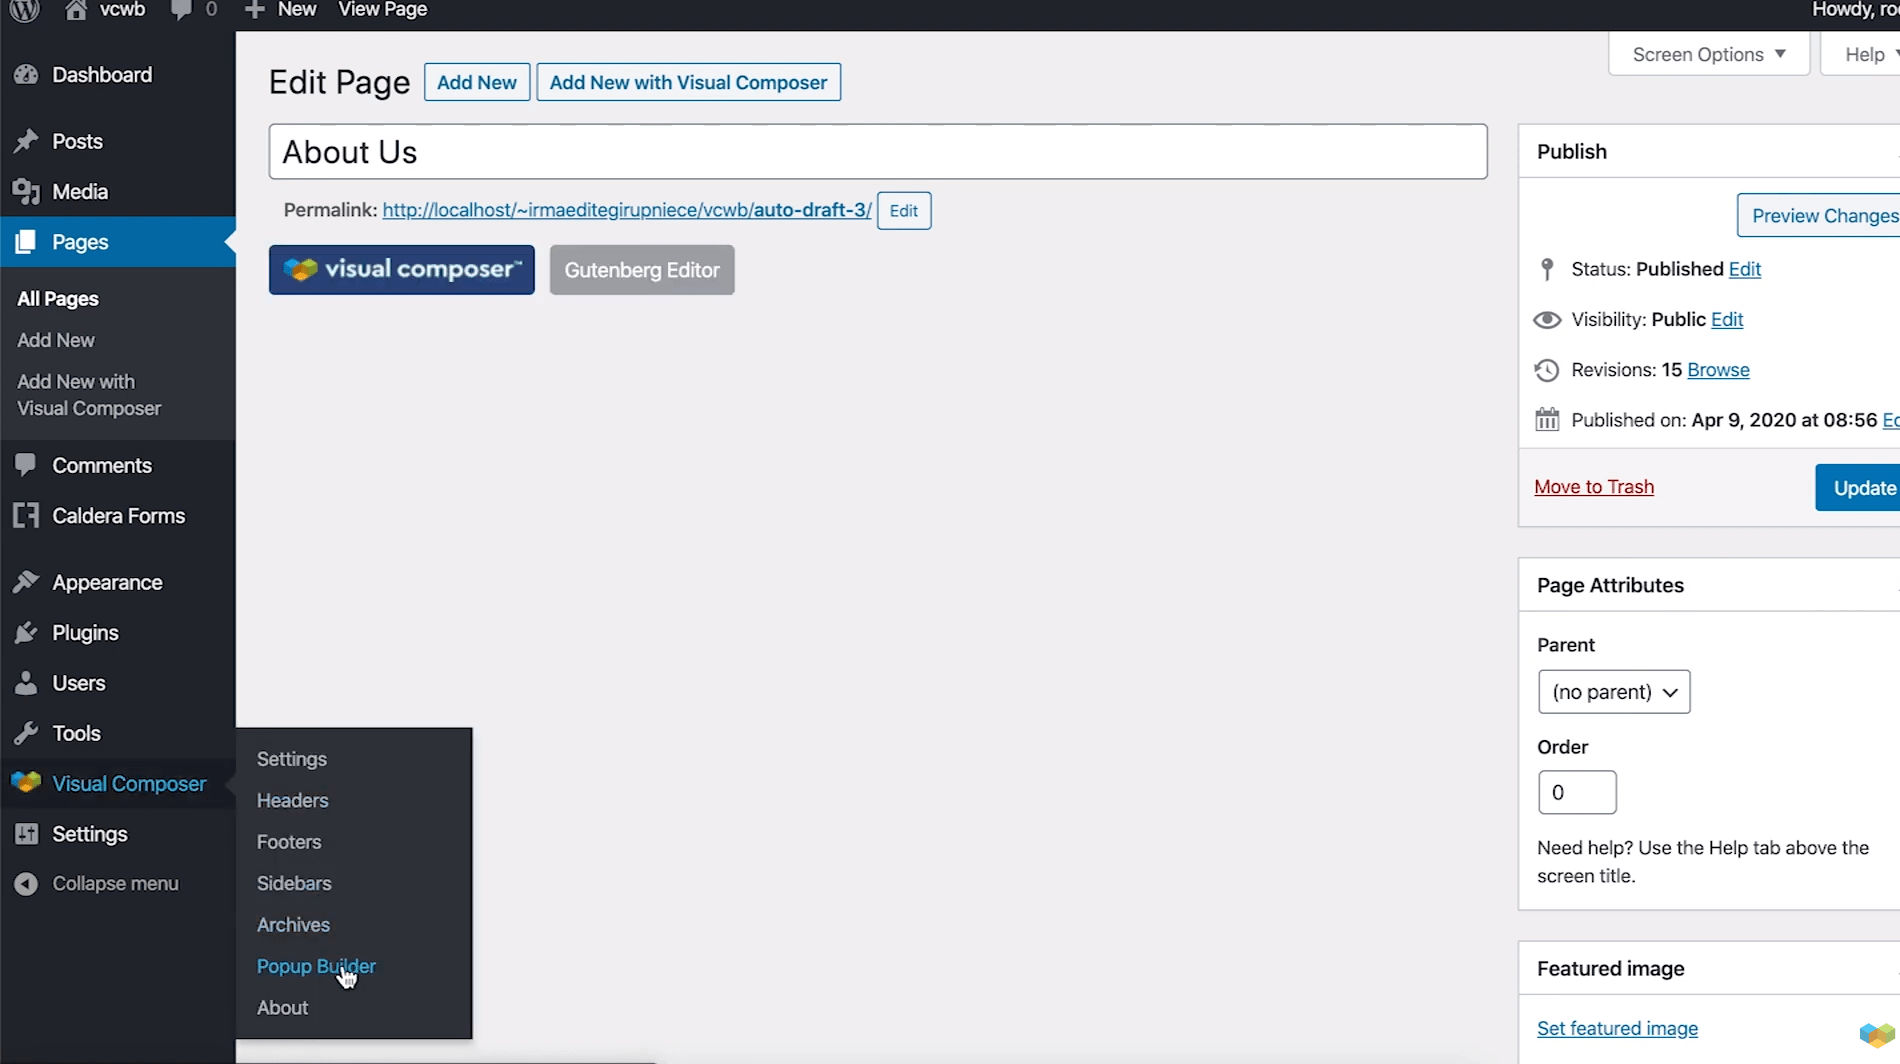
4. Click the “Add New” button in the window that appears.

5. Specify the popup template name and adjust the popup container settings to style the overall look, including overlay shape, width, and position, and the close button.
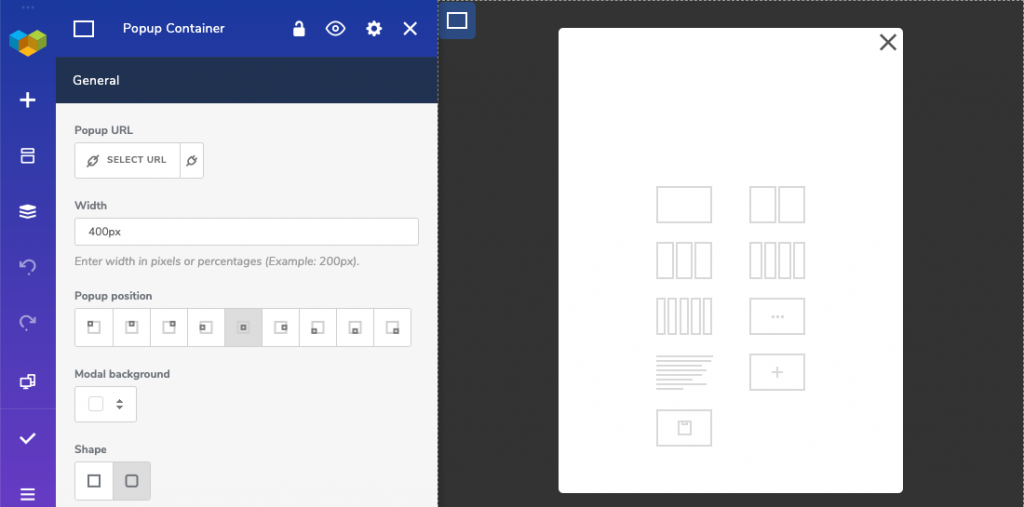
6. Click the “+” icon on the popup design to open the elements library and add text, buttons, images, and other elements to your Visual Composer popup.
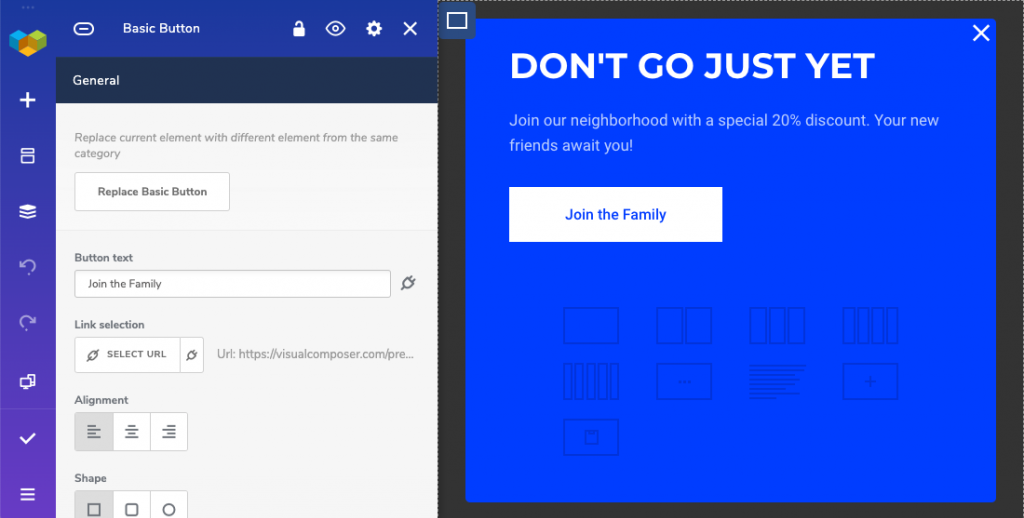
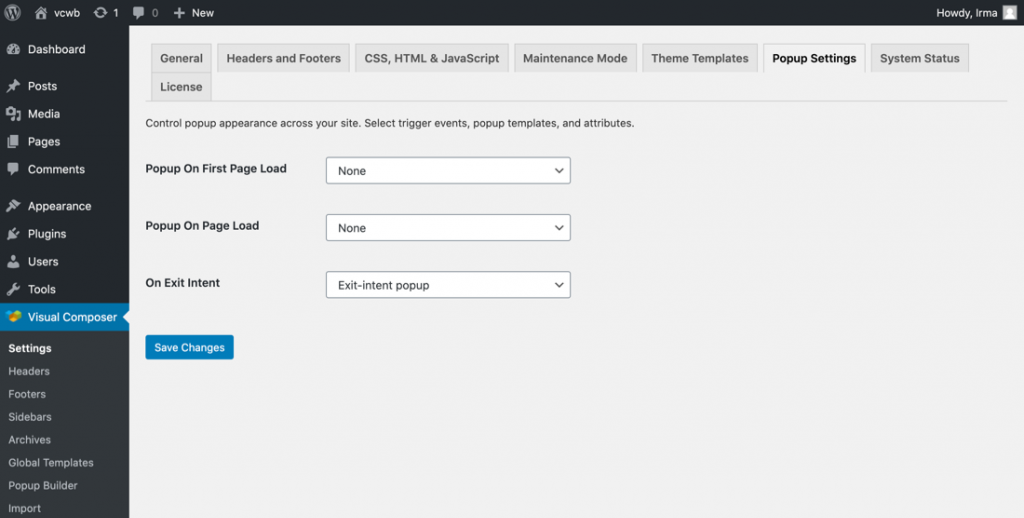
7. Once you’ve designed your popup, you can go to “Settings” in the Visual Composer menu and define the trigger events.
Method 2: Using Picreel Popup Builder
Picreel is a popup maker with high functionality that delivers a smooth experience across multiple platforms. Follow these steps to make a popup using Picreel:
1. Sign up for a Picreel account and log in.
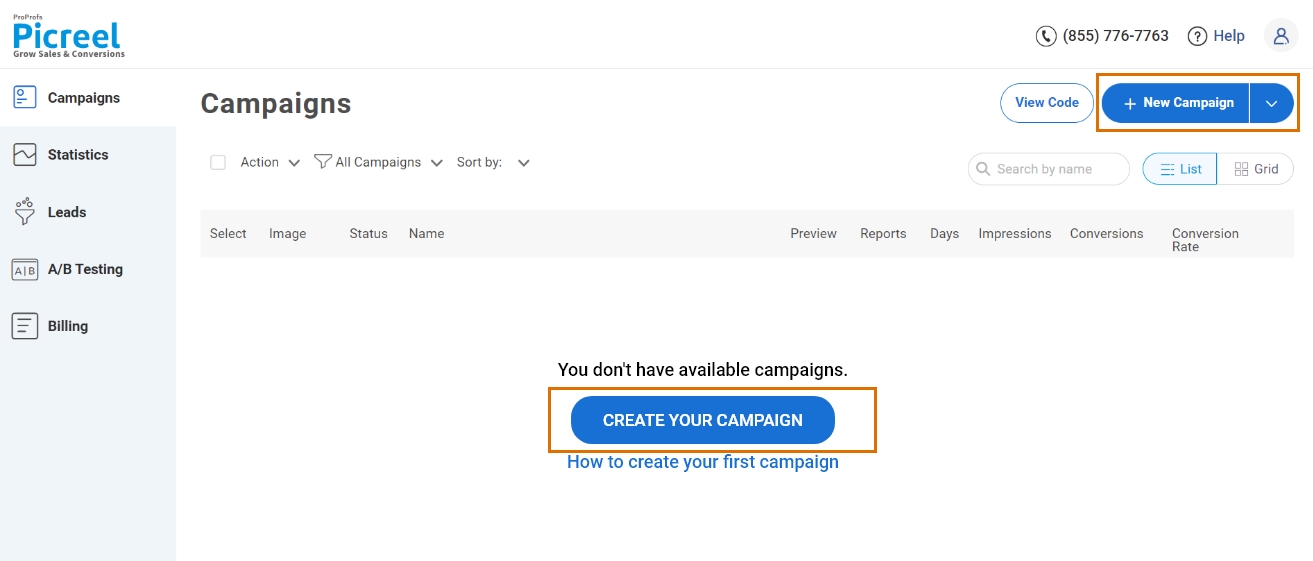
2. Go to the “Campaigns” menu and click “New Campaign” from the top right. You can select the templates option from the drop-down or start from scratch.
3. From the templates menu, choose the type of popup you want to create.

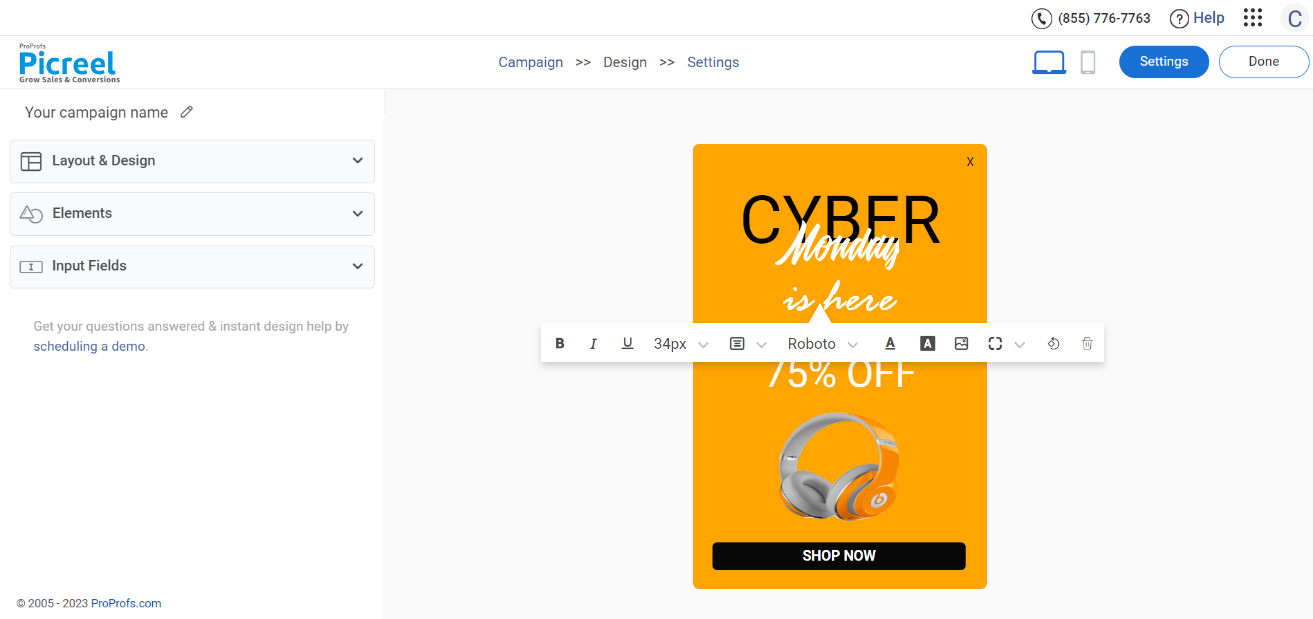
4. Once you select the design, customize it according to your preferences.
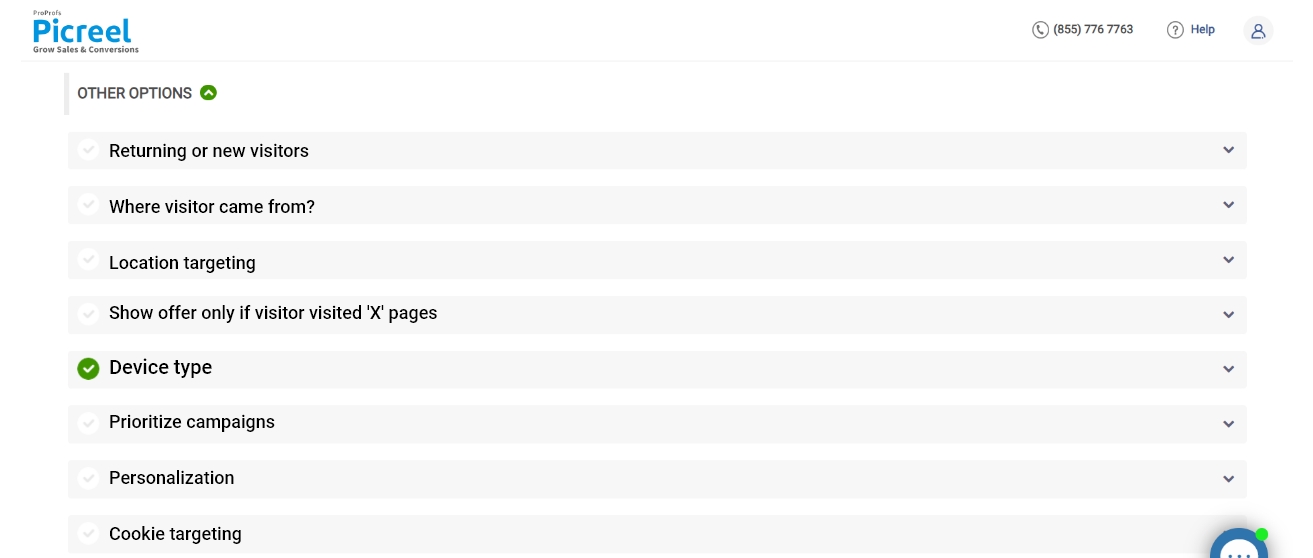
5. Configure your targeting and trigger options to specify when and where you want your popup to appear.
6. Click “Save” to activate your popup.
Embedding Picreel Code Inside Visual Composer
To embed a Picreel popup in your Visual Composer website, follow these steps:
1. Navigate to campaigns from your Picreel dashboard and click “View Code.” Then, click on the code to copy it.

2. Log in to your WordPress website.
3. Navigate to the admin panel of your WordPress website and choose the “Visual Composer” plugin. Next, click “CSS, HTML & JavaScript.”
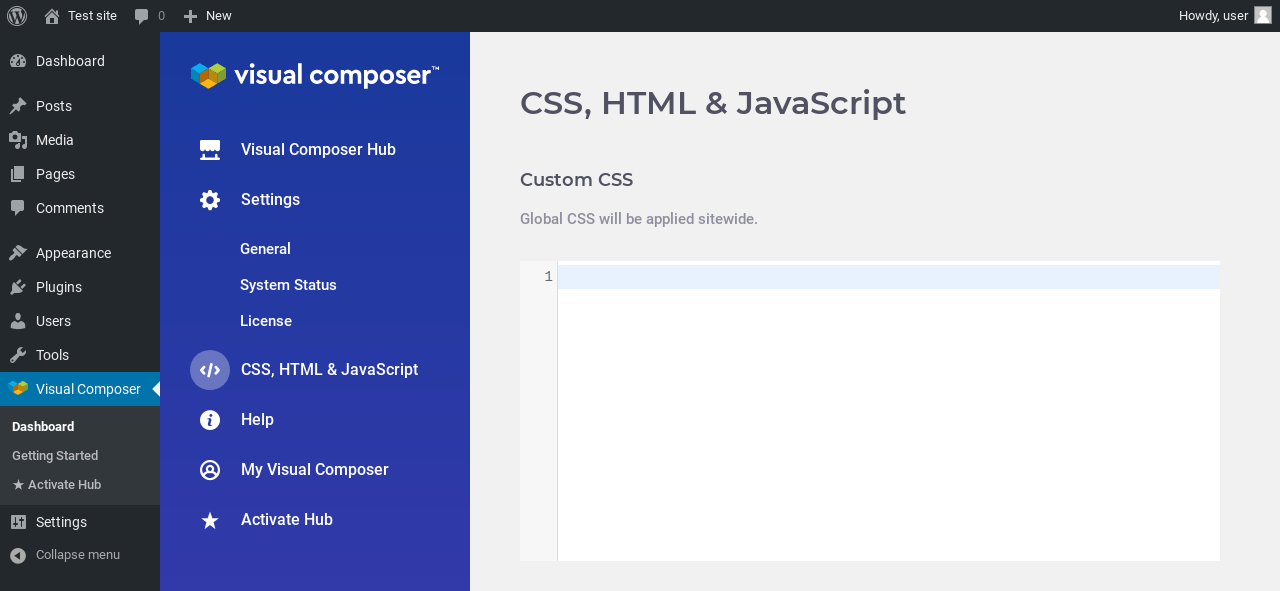
4. Add a “Raw HTML” element to the page and paste the Picreel HTML code in the text area.
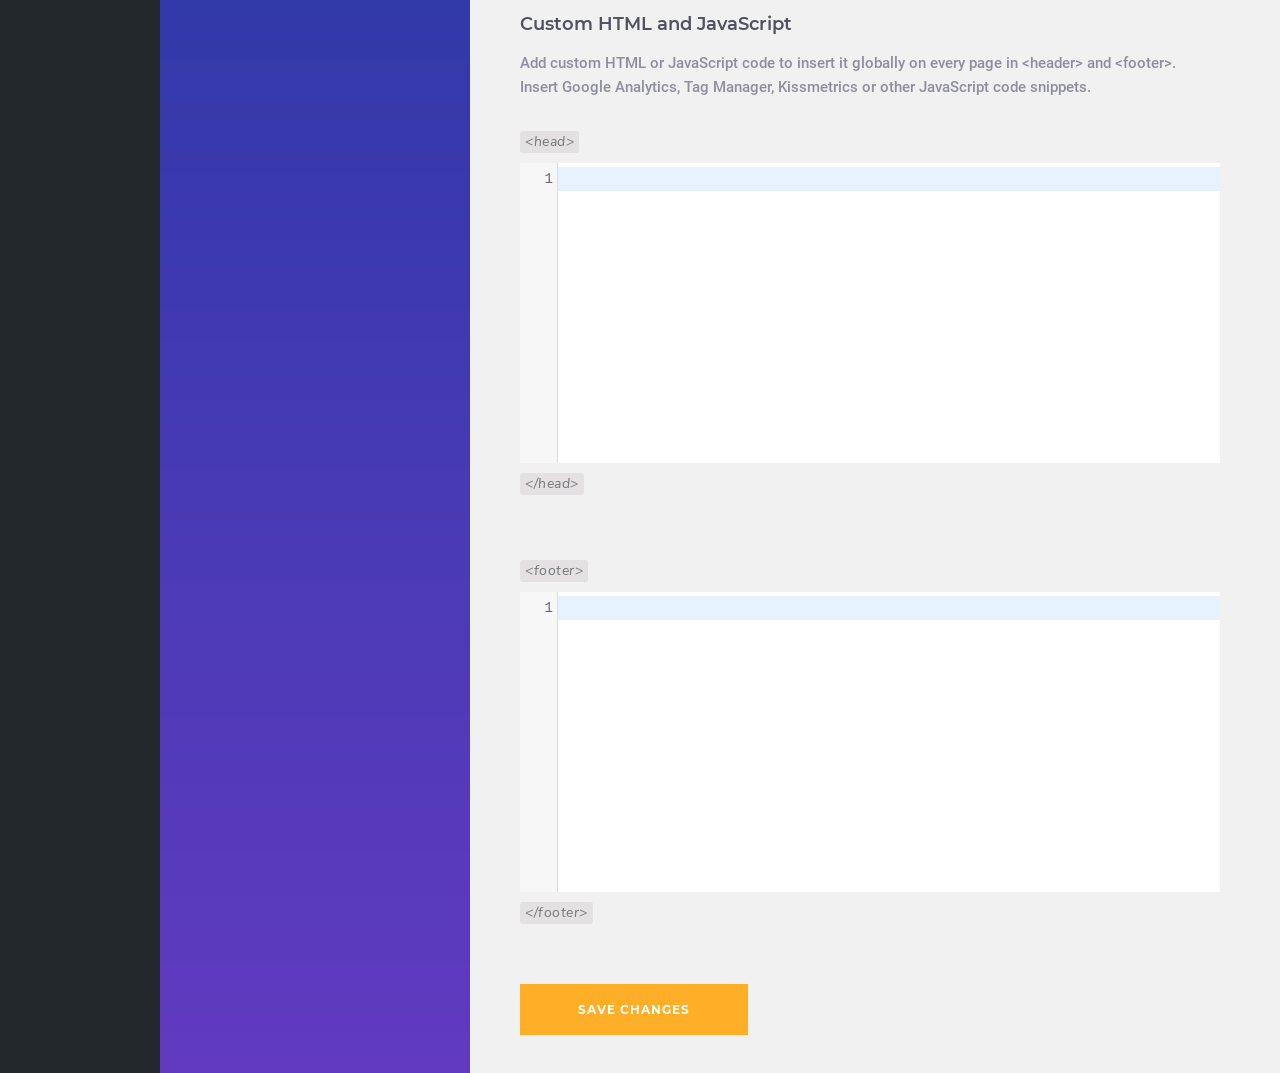
5. Click “Save Changes.”
That’s it. You’re all done.
Read More - Best Popup Maker Tools: Top 8 Choices to Boost Conversions
Which Method Is Better: Method 1 or Method 2?
When considering the long-term perspective, Picreel emerges as the preferred option for creating Visual Composer popups. It offers a versatile solution that remains functional even when changing platforms and provides more advanced and customizable popup options, including sophisticated triggers.
For startups and small businesses, there is a forever-free plan that allows unlimited popup creation with premium features. There are also paid options available, starting at just $9.99/month.
However, if you prefer a simpler approach and want to avoid integration complexities, Visual Composer’s built-in popup can still effectively meet your needs. The main goal should be to create engaging and conversion-driving popups, regardless of the chosen method.
Feel free to experiment with different approaches to find out which one works best for your specific requirements and business goals.
FREE. All Features. FOREVER!
Try our Forever FREE account with all premium features!

 We'd love your feedback!
 Thanks for your feedback!


