I’ve been using Hygraph CMS for a while and have built several content-rich websites and apps on it. It’s an API-first headless CMS that allows you to manage content across platforms.
The good thing is that it supports many API integrations, which makes content management seamless. And that also makes embedding popups way easier.
So, you may ask – “Can I create Hygraph CMS popups?”
The answer is yes, but with a small caveat—you’ll need the help of a third-party popup tool. In fact, I was experimenting with one such platform and pretty much liked what I created.
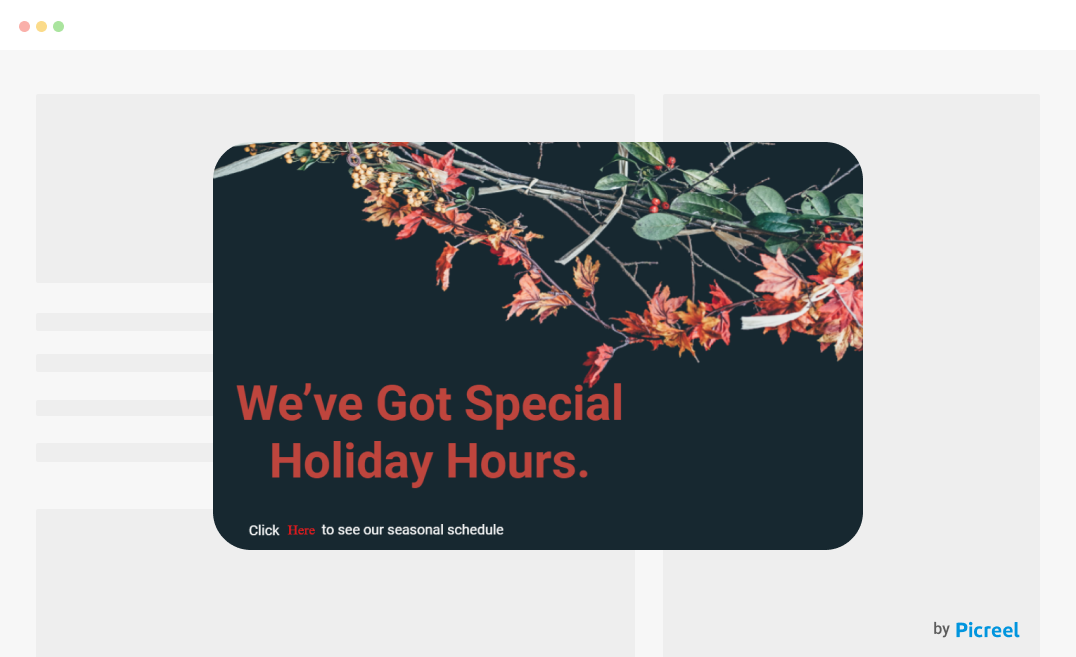
Looks dope, right? I used Picreel to create this. You can use any third-party software to add popups in Hygraph CMS.
Since I use Picreel as my go-to popup builder, I’ll share how you can create your own using it. In the later part of the blog, I’ve shared some reasons why I’d recommend you use Picreel.
Let’s get started.
Create Popups in Hygraph CMS Using Picreel Popup Builder
I liked Picreel primarily because of its advanced features and cross-platform flexibility. You can create a popup running within minutes without diving too deep into codes. With exit-intent technology, mobile popups, A/B testing, and different targeting options, it’s a great platform to begin with.
Let’s check the steps now.
Step 1: Sign Up for Picreel
First things first, you’ll need to create a Picreel account. Head over to their website and sign up. They offer a free trial, so you can test it out before committing.
Step 2: Create a New Popup
Once you’re in the Picreel dashboard, the next step is to create your first popup. Here’s how –
- Go to the “Campaigns” menu.
- Click the “+ New Campaign” button.
- You’ll be asked to select a template for your popup. You can also start from scratch.
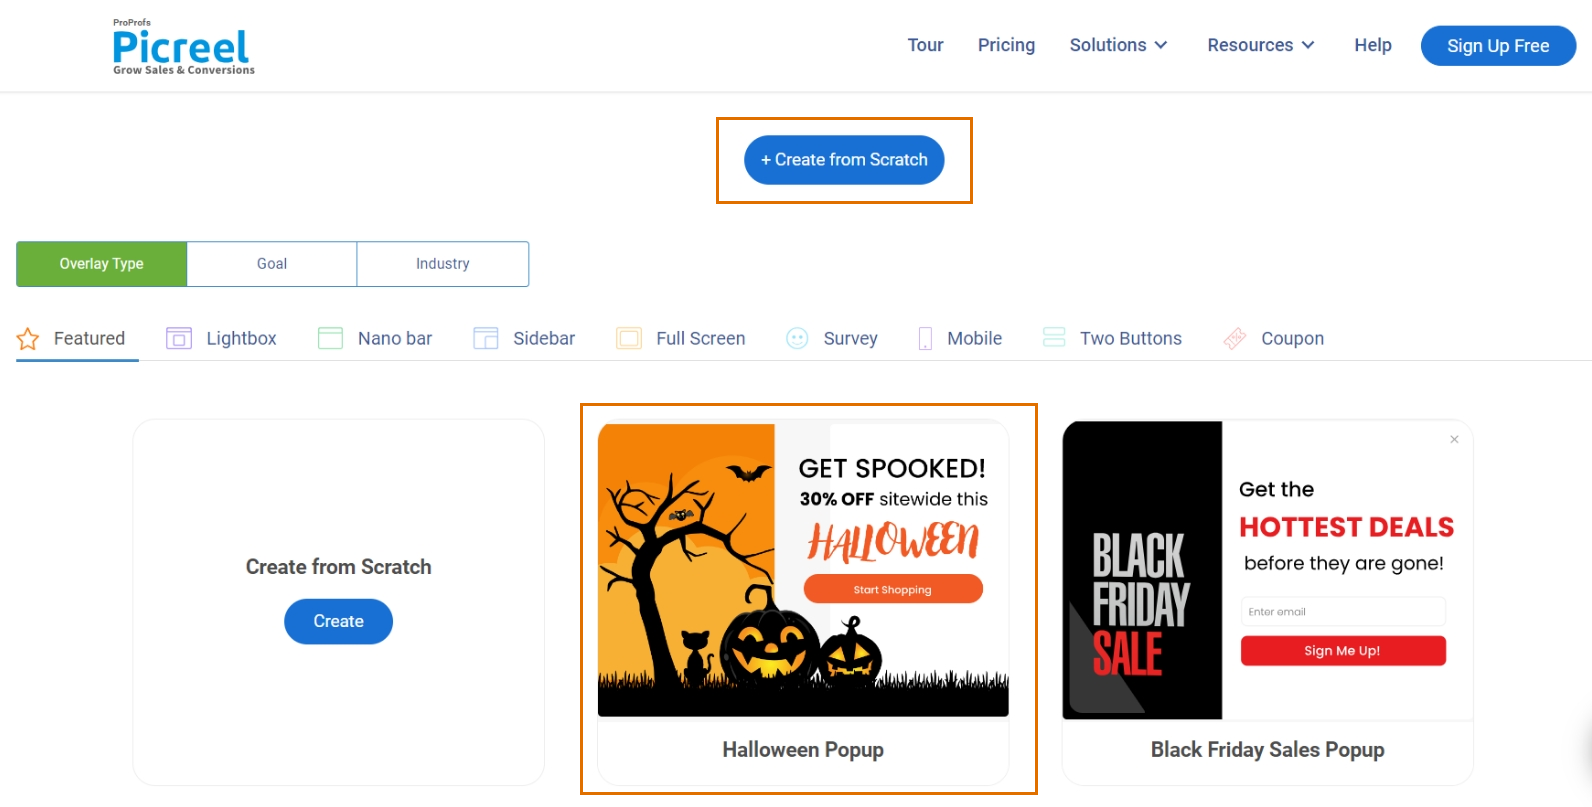
After selecting your template, you’ll be taken to the customization screen, where you can edit the text, colors, images, and the popup’s overall layout.
Step 3: Customize Your Popup
Picreel’s drag-and-drop editor makes it easy to customize your popup. You can change the colors, fonts, images, etc., to match your brand.
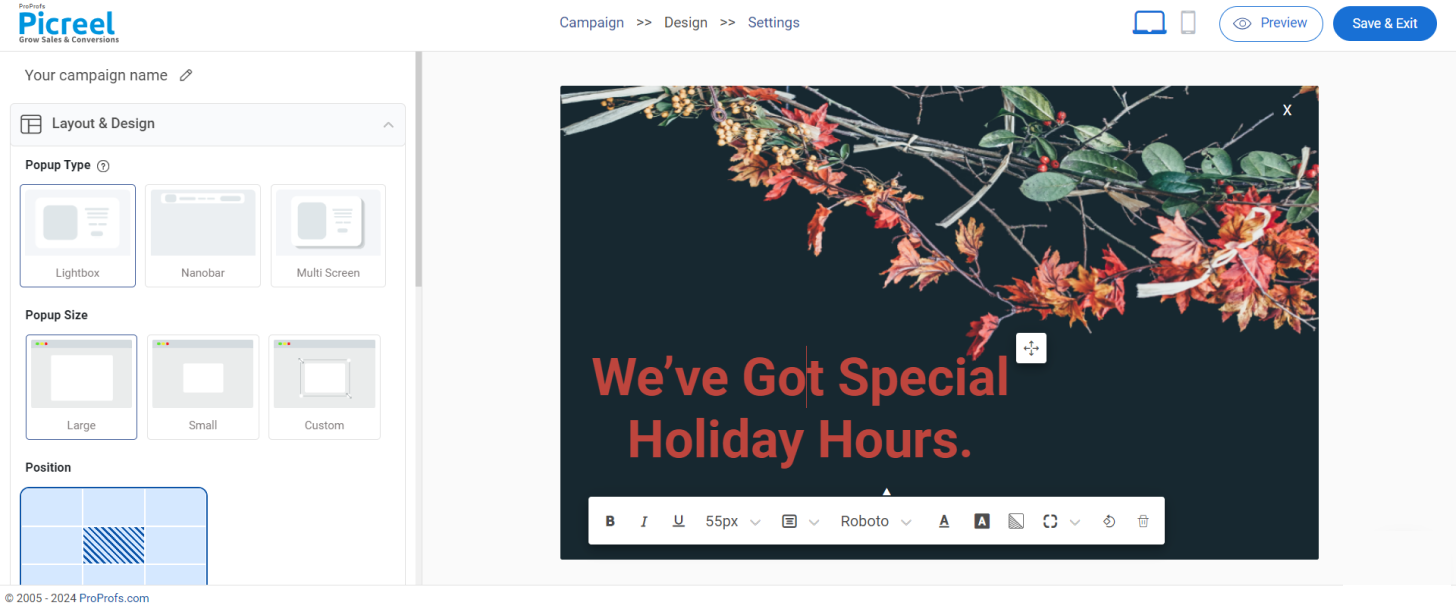
You get plenty of flexibility here, so don’t worry if you’re not a designer. Here are some of the changes that you can make to your popups –
- Edit Text: Click on the text elements within the popup to change the wording. Keep the message clear and concise.
- Add Images: You can upload images or choose from a gallery of stock images within Picreel. Make sure whatever you choose aligns with your branding.
- Change Colors & Fonts: Use your brand colors to keep everything cohesive. You can change the background, text, and button colors to ensure the popup stands out without clashing with your site design.
- Button Links: Ensure the call-to-action (CTA) button is linked to the correct page—whether that’s a signup form, a product page, or elsewhere.
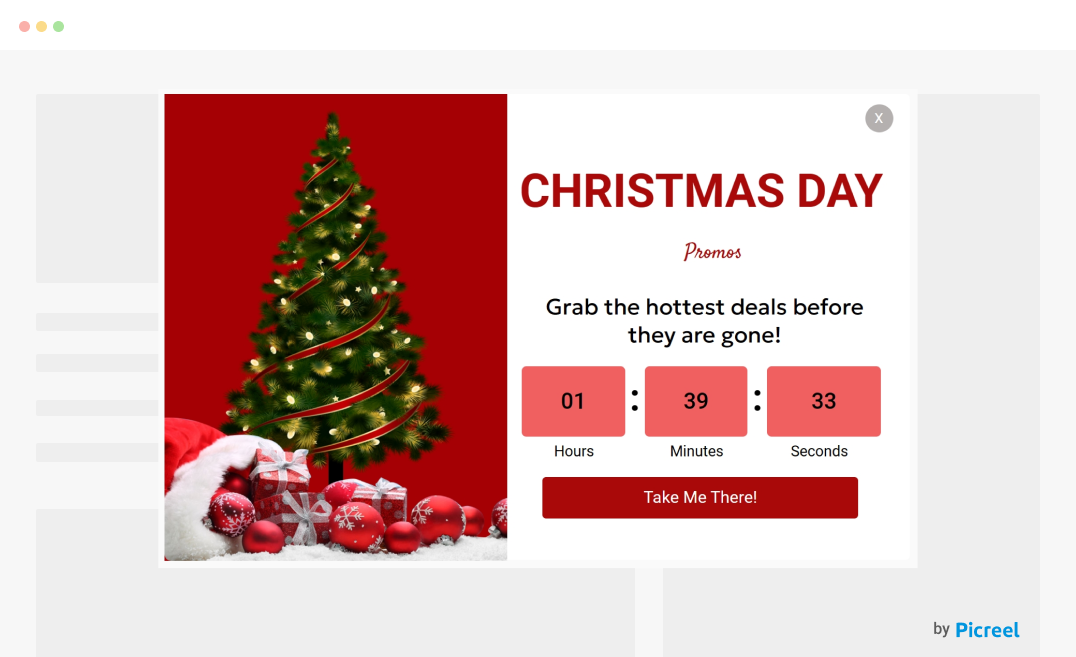
Step 4: Set Up Targeting Options
Using Picreel, you can be very specific about who sees your popup, when do they see it, and how often.
You can choose from a range of targeting options, including –
- Exit Intent: Show the popup when a visitor is about to leave your site.
- Time on Page: Trigger the popup after a visitor has spent a certain amount of time on your page.
- Scroll Depth: Display the popup when a visitor scrolls down a certain percentage of your page.
- Page Targeting: Show the popup on specific pages or URLs.
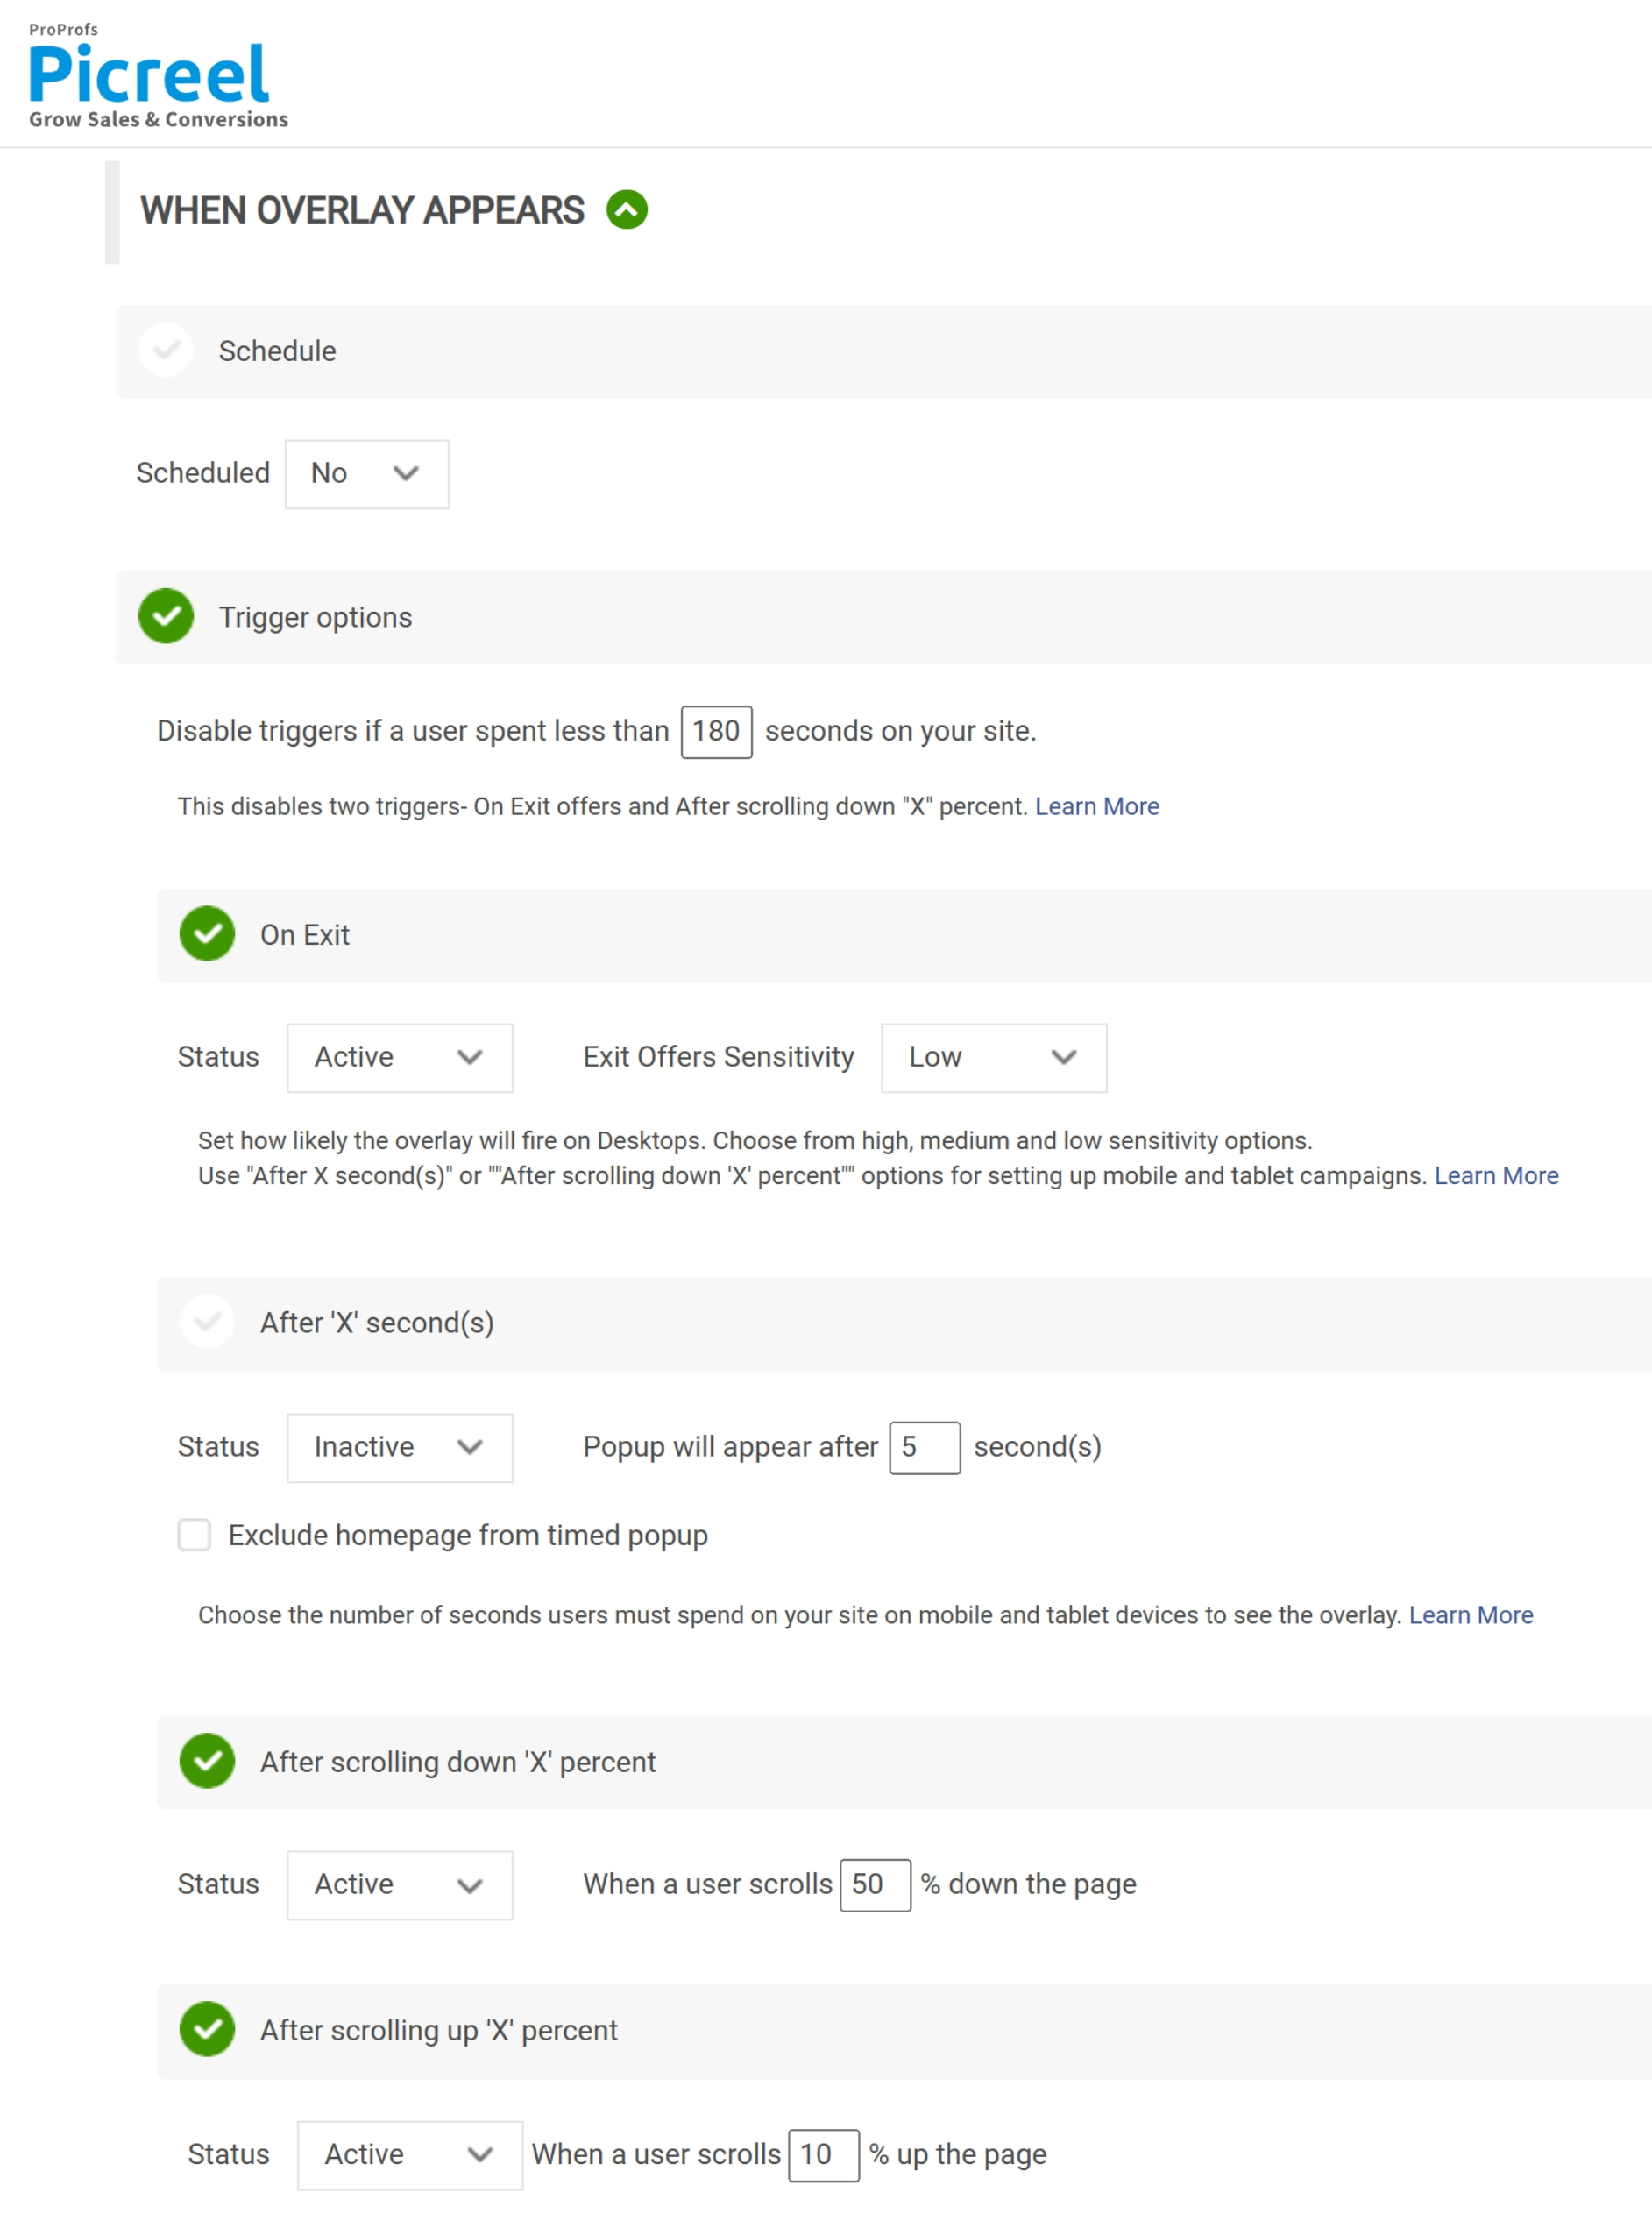
Experiment with different targeting options to see what works best for your audience. Next, save your customizations.
Looking for a visual way to understand how each step works? Check this video –
Step 5: Embed HTML Code Inside Hygraph CMS
Once your popup is ready, Picreel will generate an embed code. This will typically include a few steps –
1. First, you need to navigate to “Installation”.
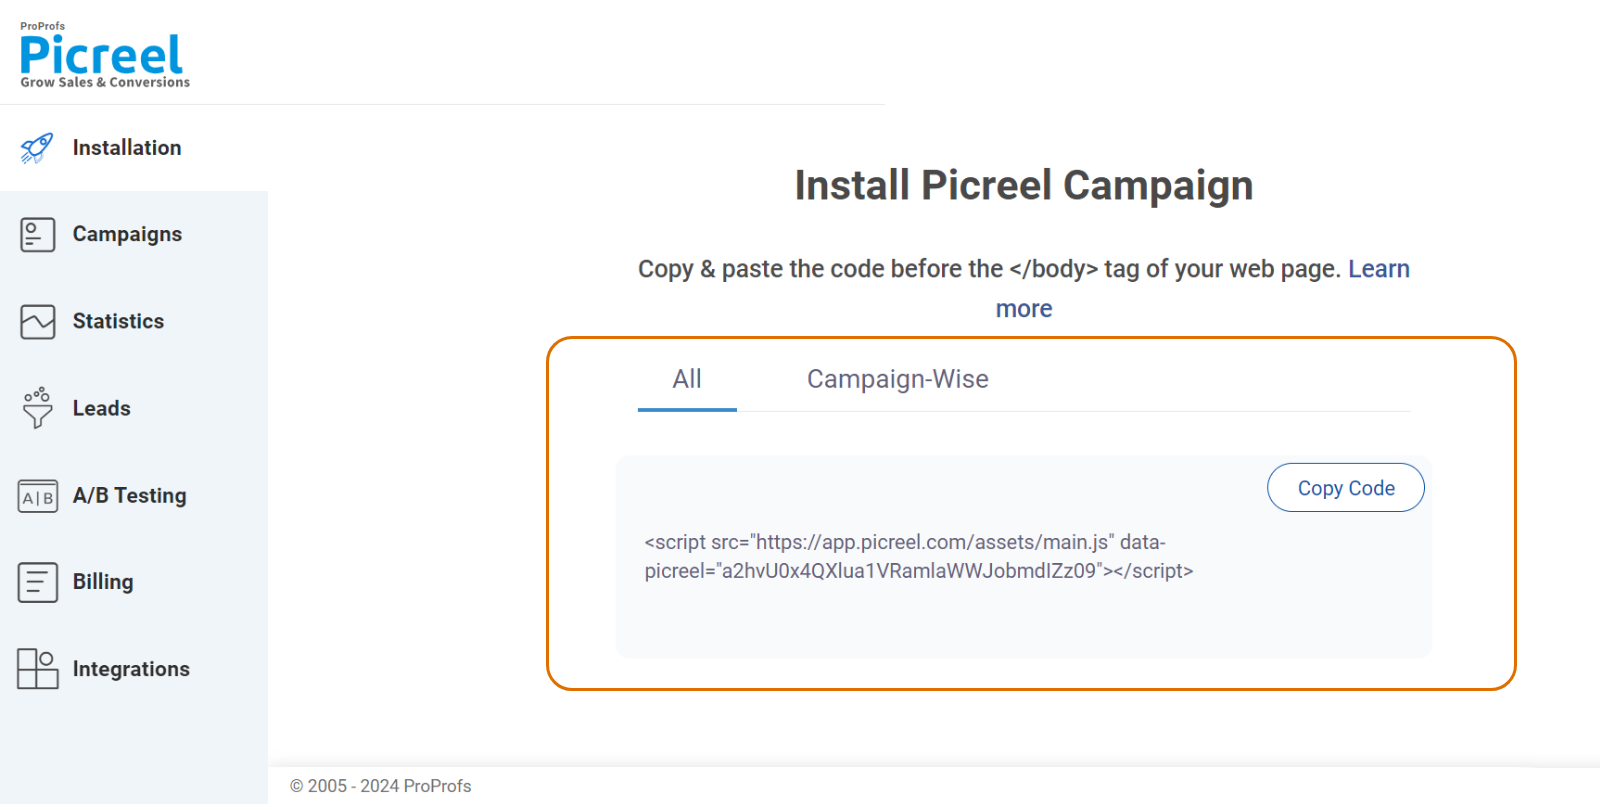
2. Next, copy the code by clicking on “Copy Code.”
3. Log in to your Hygraph account and navigate to the content model where you want the popup to appear.
Hygraph provides an option to embed external HTML elements within their rich text field, which is perfect for our use case.
4. Once you’re in the rich text editor for your content, switch to the “HTML” view (this option is in the toolbar) and paste the Picreel embed code. Save the changes.
5. Once the code is embedded, publish the changes in Hygraph. The popup should now appear according to the targeting settings you’ve configured in Picreel.
🔥 Pro Tip: Test the popup across different devices to ensure it’s displaying correctly. Popups can sometimes behave differently on mobile than on desktop, so it’s always good to check.
Wrapping Up
Creating Hygraph CMS popups using a third-party tool such as Picreel is a smooth process, even if it involves embedding HTML or JavaScript into your content. I find Picreel’s combination of ease of use, customizability, and advanced targeting features a perfect match for Hygraph CMS.
This method has not only helped me grow my email list but also improved the overall interaction rate on my site. And you don’t even need to spend anything. Don’t believe me?
Picreel offers a free plan that comes with all premium features. Even if you want to scale up in the future, you’ll just need to pay $9.99 per month.
So, give it a try. Experiment with different designs and targeting options, and don’t forget to monitor the results.
 Tips
Tips
We’d love to hear your tips & suggestions on this article!
FREE. All Features. FOREVER!
Try our Forever FREE account with all premium features!

 We'd love your feedback!
 Thanks for your feedback!


