I’ve been working with Netlify for a while, and trust me when I say… I love how it simplifies website hosting!
It’s packed with features like continuous deployment, serverless functions, and built-in global CDN support. I think it’s an ideal choice for anyone wanting to focus more on building websites than managing the backend.
One question I see a lot, though, is how to add popups in Netlify.
Searching “Netlify popup” on Google gave me some strange results. It seemed that users had faced some issues using the platform’s ‘Identity Widget Popup’ on their website.
With some further research, here’s what I found –
- Does Netlify support popups? Yes.
- Does it have a built-in popup builder? No.
I used a third-party popup building software, and the result was pretty decent, in my opinion.
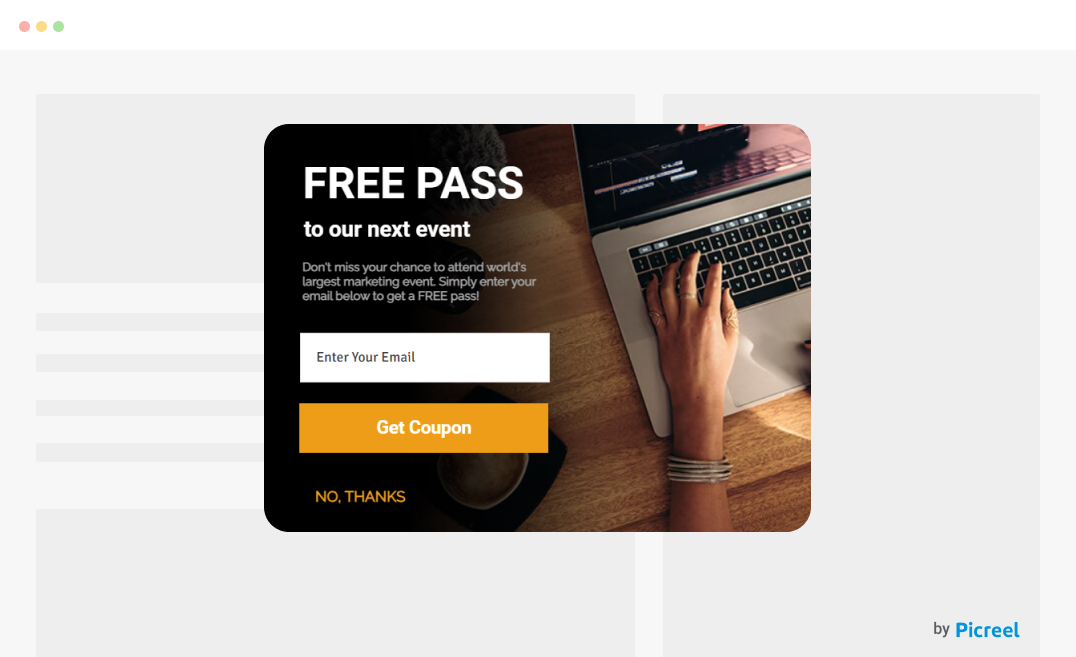
Looks pretty sleek, right? I used Picreel to create this.
You can use it or any other third-party software since creating one using Netlify might not be the easiest option. (Don’t worry; these tools usually offer a free plan, so you don’t need to pay anything upfront.)
In this blog, I’ll share how you can add popups in Netlify through simple steps. Let’s get started.
How to Create a Popup in Netlify Using Picreel
So why Picreel?
Well, I wanted a tool that was straightforward, didn’t require complex integrations, and gave me a lot of flexibility. Also, with multiple targeting options, mobile popups, A/B testing, and many other features – its free plan is an absolute bargain!
Let’s discuss the steps.
Step 1: Sign Up for Picreel
First things first, you’ll need to create a Picreel account. Head over to their website and sign up. They offer a free trial, so you can test it out before committing.
Step 2: Create a New Popup
Once you’re in the Picreel dashboard, the next step is to create your first popup. Here’s how –
- Go to the “Campaigns” menu.
- Click the “+ New Campaign” button.
- You’ll be asked to select a template for your popup. You can also start from scratch.
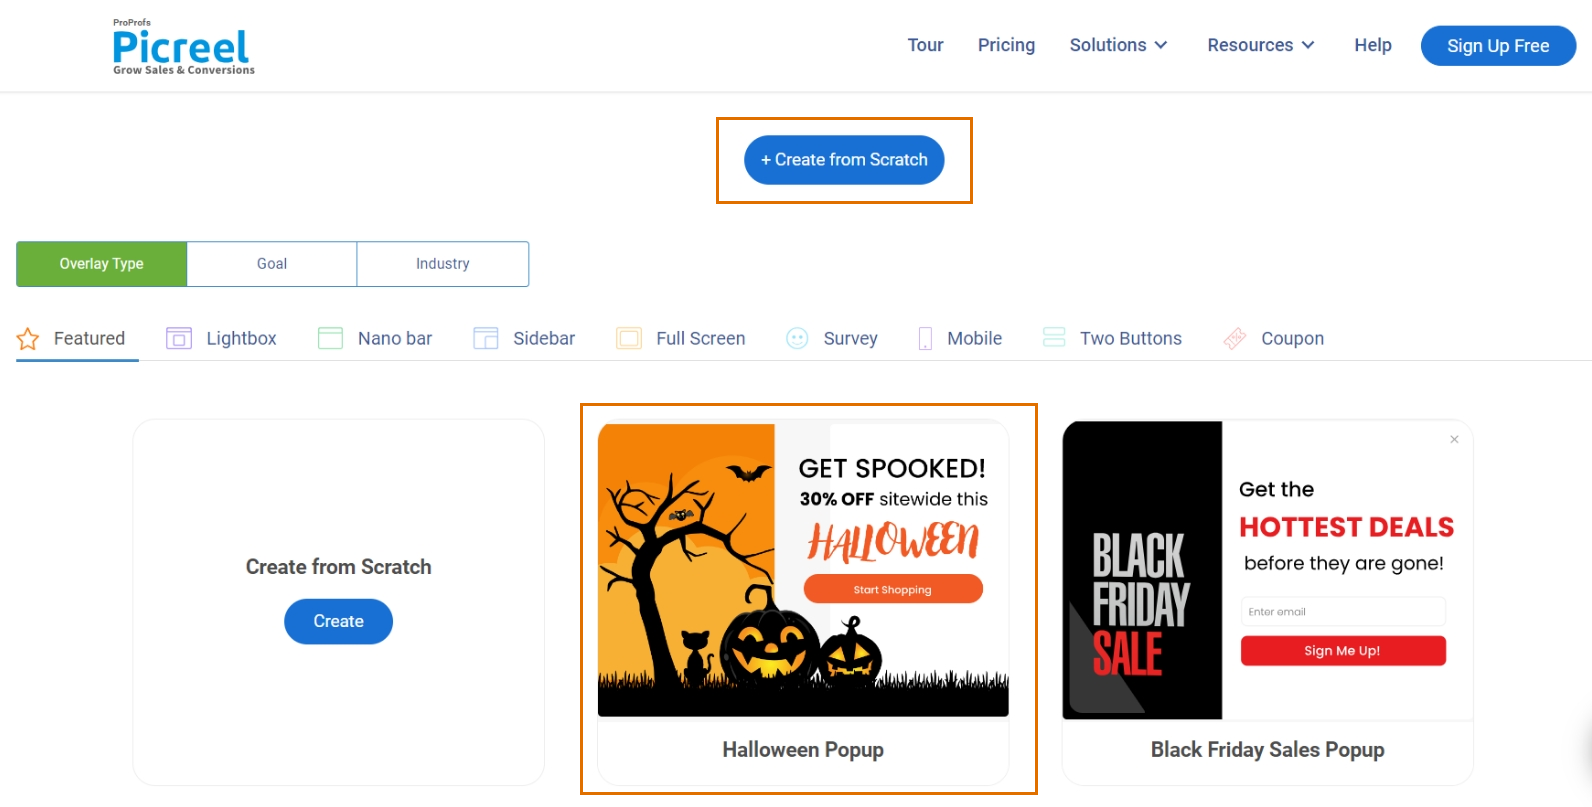
After selecting your template, you’ll be taken to the customization screen, where you can edit the text, colors, images, and the popup’s overall layout.
Step 3: Customize Your Popup
Picreel’s drag-and-drop editor makes it easy to customize your popup. You can change the colors, fonts, images, etc., to match your brand.
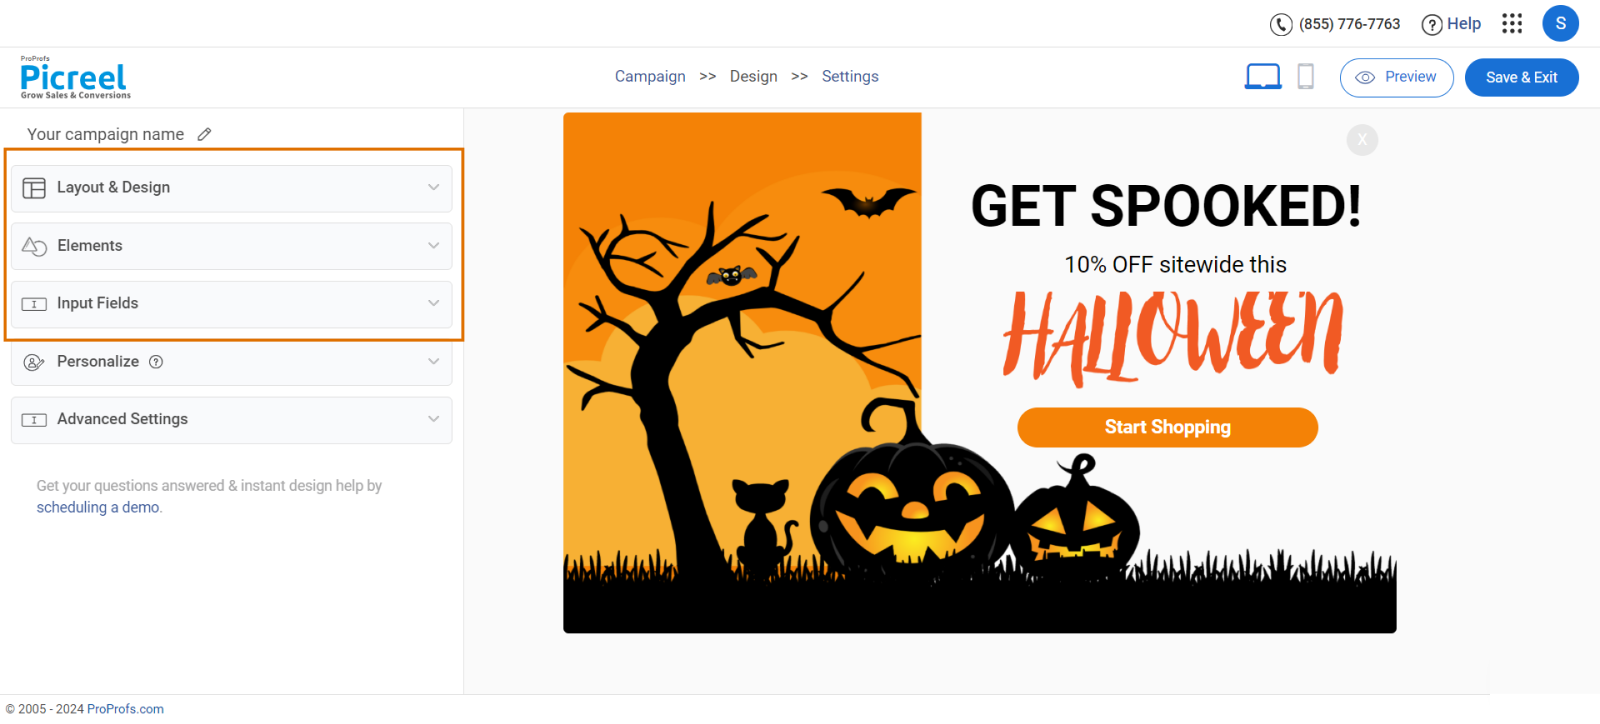
You get plenty of flexibility here, so don’t worry if you’re not a designer. Here are some of the changes that you can make to your popups –
- Edit Text: Click on the text elements within the popup to change the wording. Keep the message clear and concise.
- Add Images: You can upload images or choose from a gallery of stock images within Picreel. Make sure whatever you choose aligns with your branding.
- Change Colors & Fonts: Use your brand colors to keep everything cohesive. You can change the background, text, and button colors to ensure the popup stands out without clashing with your site design.
- Button Links: Ensure the call-to-action (CTA) button is linked to the correct page—whether that’s a signup form, a product page, or elsewhere.
Step 4: Set Up Targeting Options
Using Picreel, you can be very specific about who sees your popup, when do they see it, and how often.
You can choose from a range of targeting options, including –
- Exit Intent: Show the popup when a visitor is about to leave your site.
- Time on Page: Trigger the popup after a visitor has spent a certain amount of time on your page.
- Scroll Depth: Display the popup when a visitor scrolls down a certain percentage of the website.
- Page Targeting: Show the popup on specific pages or URLs.
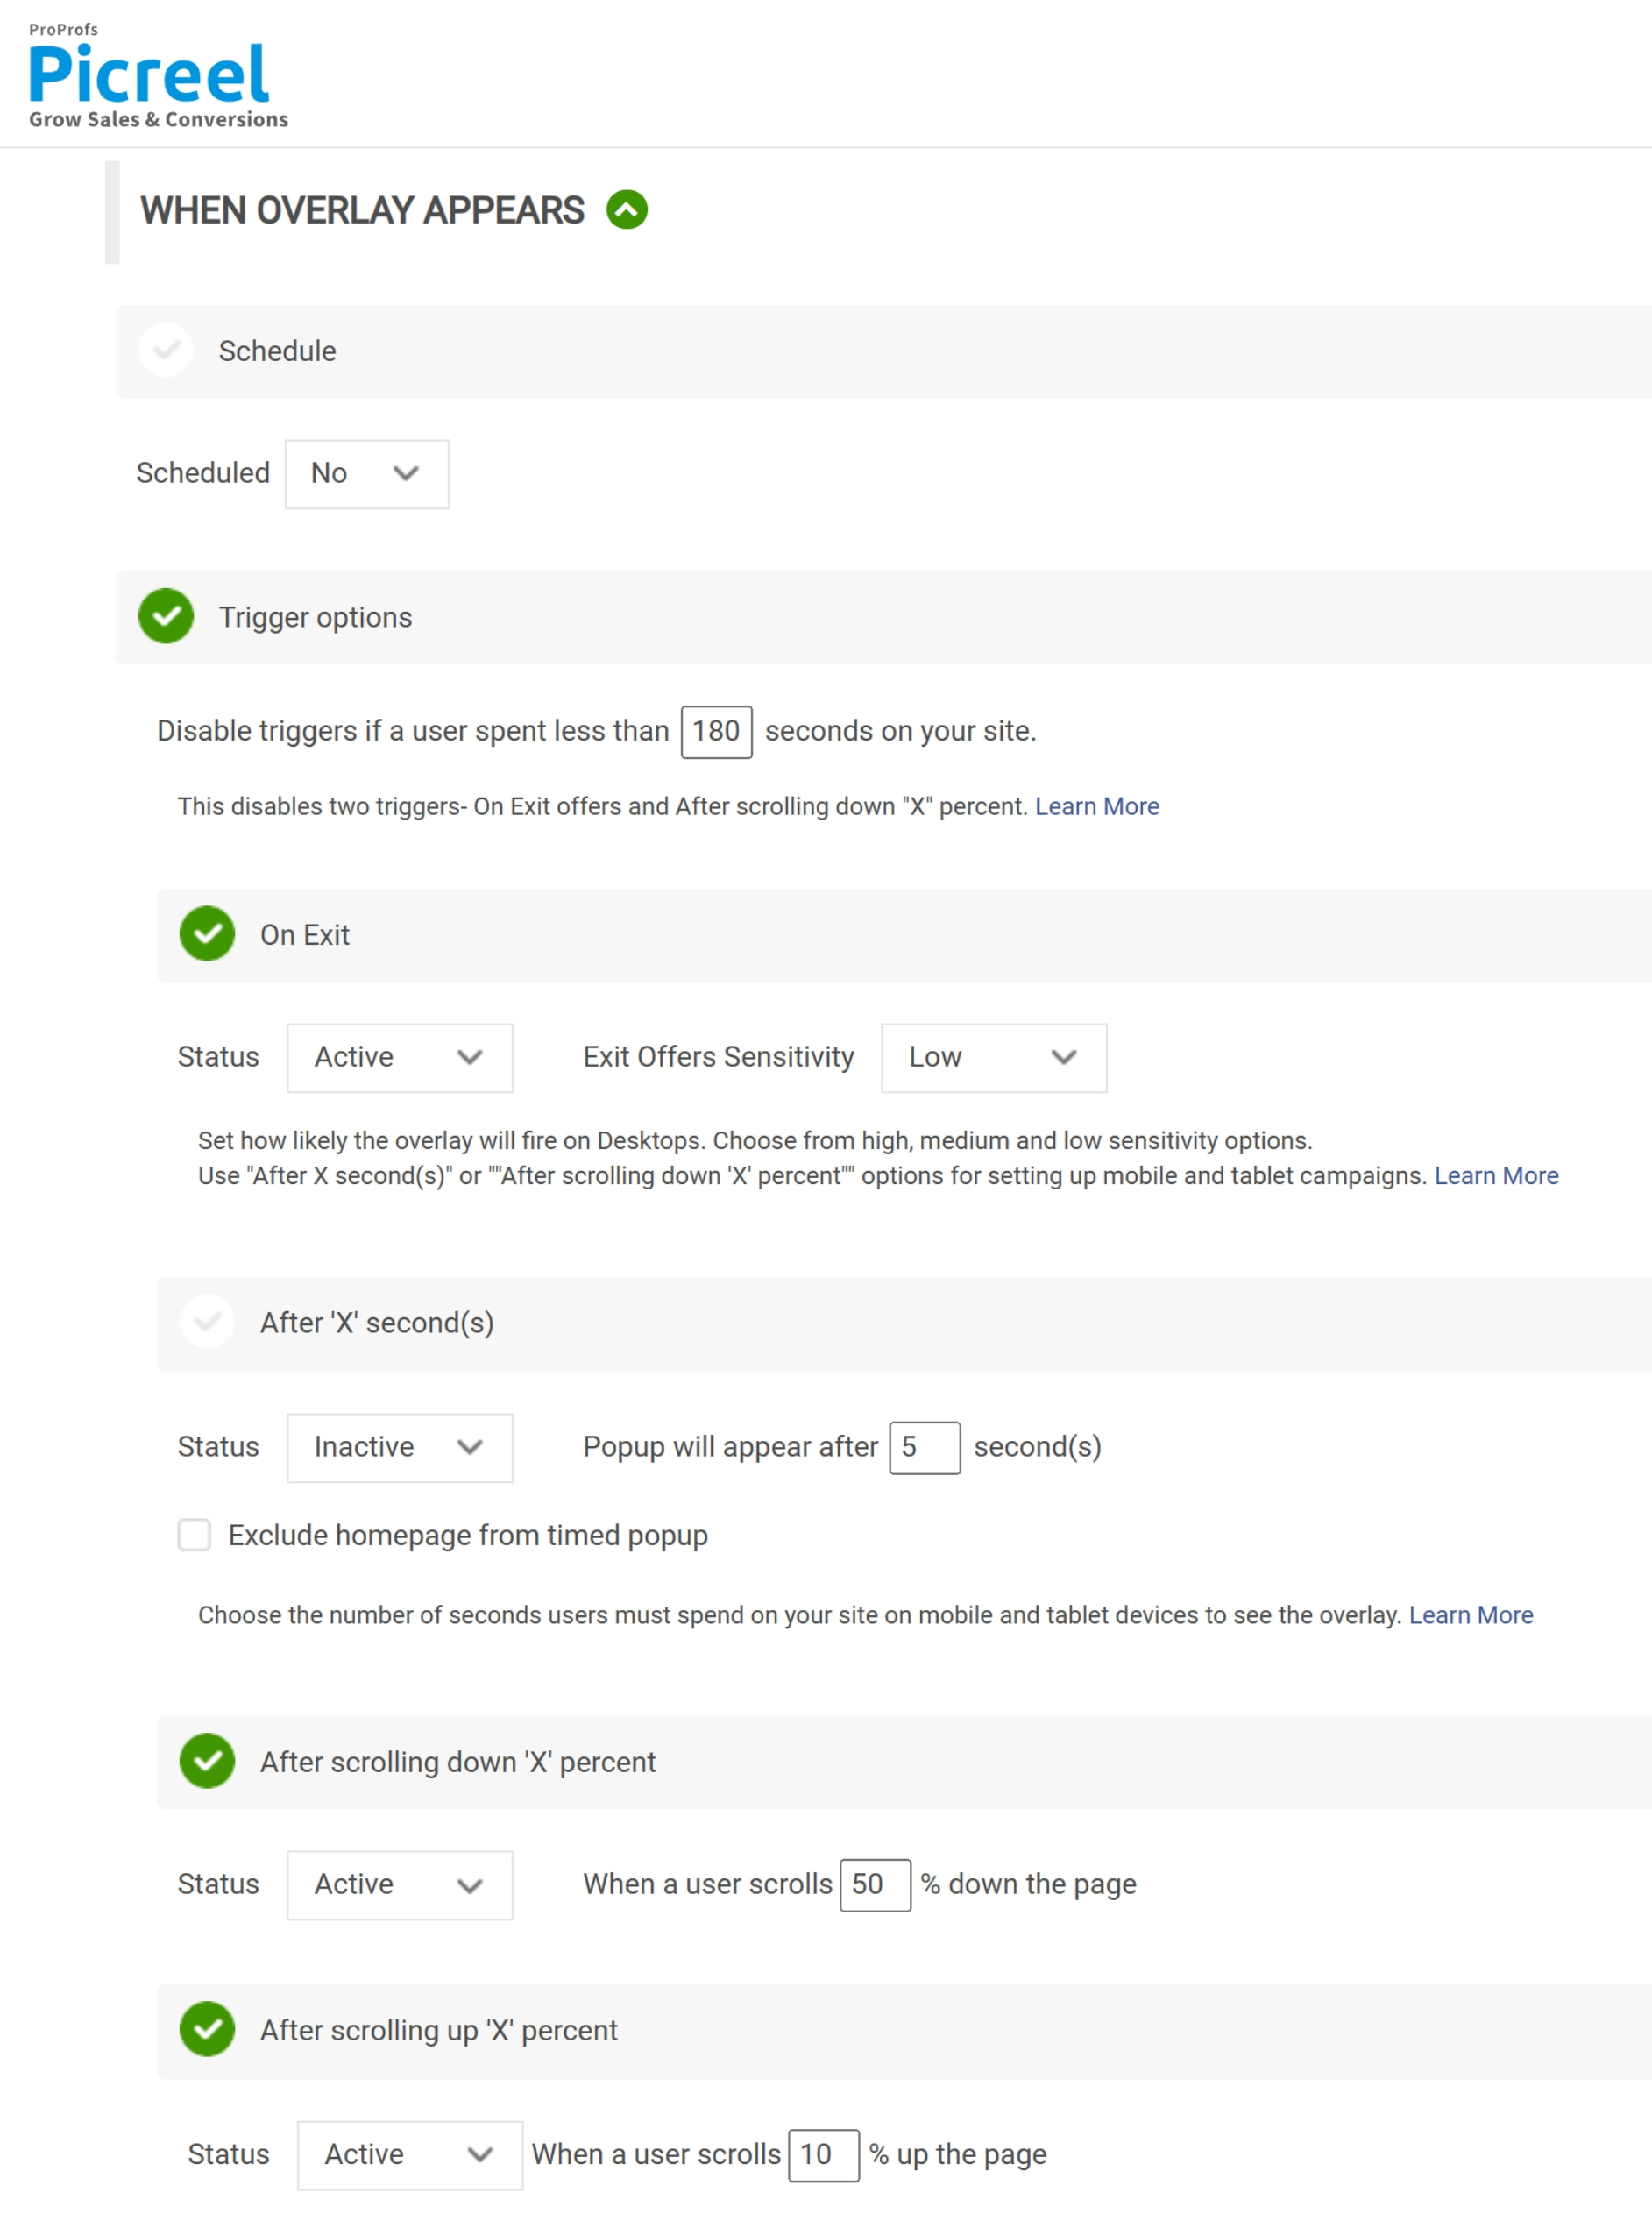
Experiment with different targeting options to check what works best for your target audience. Next, save your customizations.
Looking for a visual way to understand how each step works? Check this video –
Step 5: Embed HTML Code Inside Netlify
Once your popup is ready, Picreel will generate an embed code. This will typically include a few steps –
1. First, you need to navigate to “Installation”.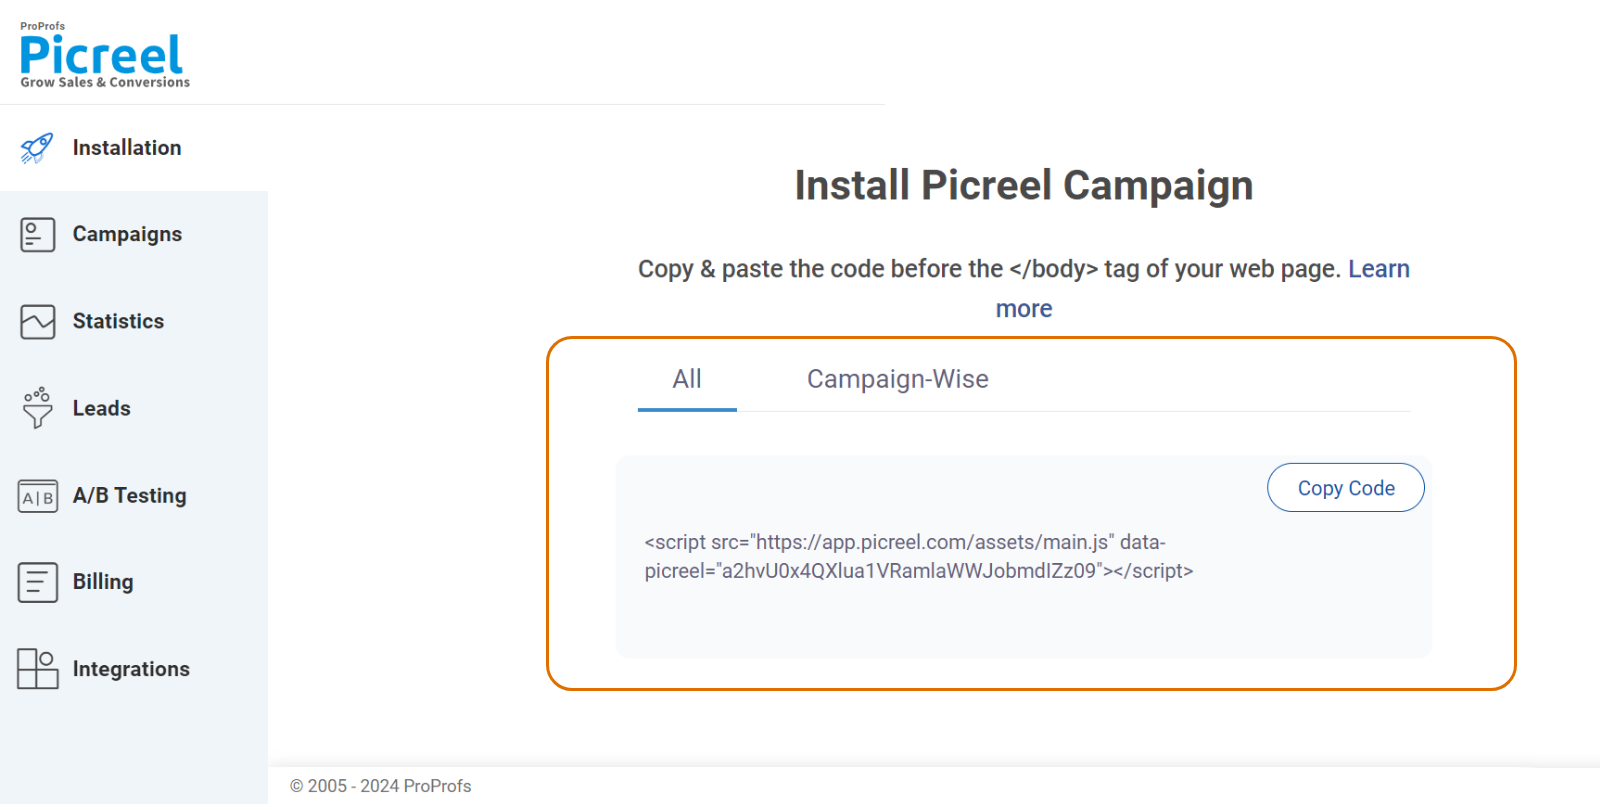
2. Next, copy the code by clicking on “Copy Code.”
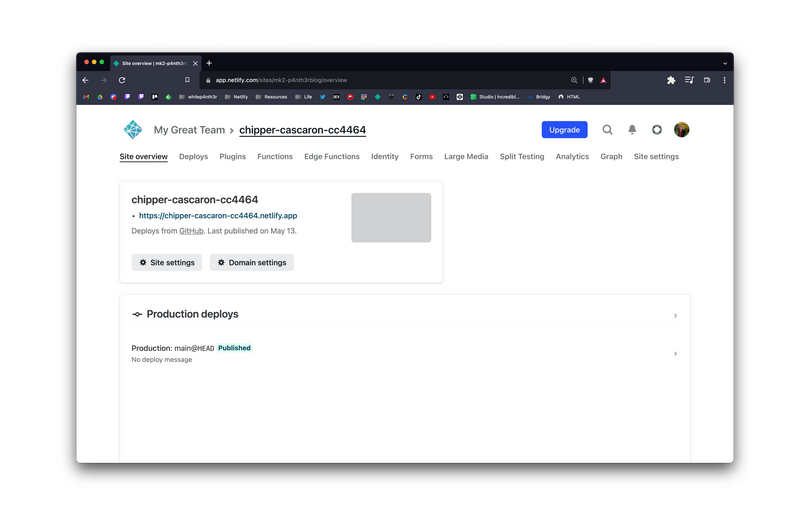
3. Go to your Netlify dashboard and select the site where you want to add the popup.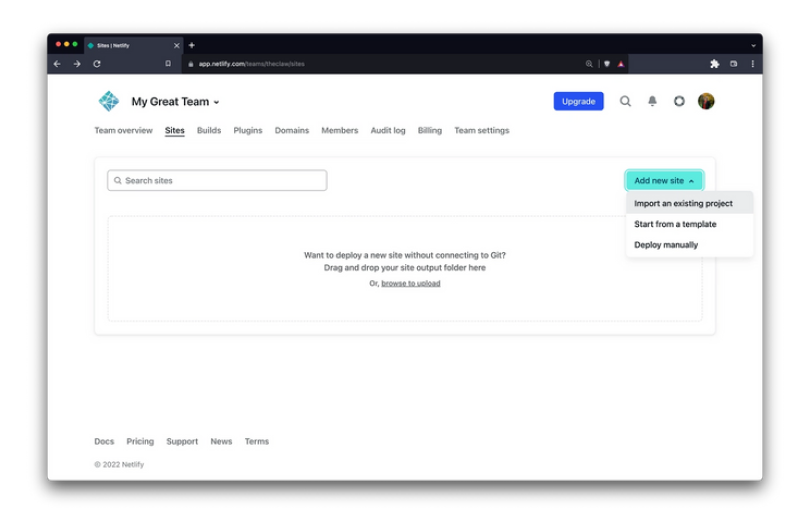
(If you’re unfamiliar with Netlify, the platform uses Git-based workflows, so you’ll need to push the popup code to your project’s Git repository.)
4. To embed the popup, you’ll need to open your website’s codebase. Here’s where it gets specific, depending on your setup –
- If you’re using a static site generator like Hugo or Jekyll, navigate to the relevant file that controls the layout (usually an index.html or layout.html file).
- If you’re working with a simple HTML site, just open the main HTML file where you want the popup to appear.
5. After embedding the code, commit the changes to your Git repository, and Netlify will automatically trigger a new deployment.
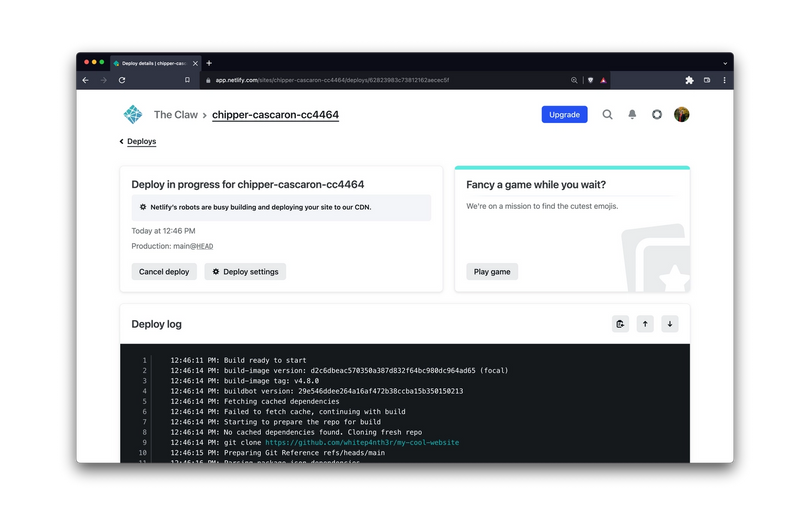
6. Once the deployment is completed, the popup will be live on your site.
🔥 Pro Tip: After deployment, visit your site and check if the popup works. While desktop popups may look great, they don’t always translate well to mobile. If you’re using Picreel, use the preview mode to check the appearance on mobile devices.
Wrapping Up
Creating a popup in Netlify using Picreel is an effective way to improve your site’s engagement. With just a few simple steps, you can design, customize, and embed a popup that fits your goals—whether that’s growing your email list, promoting a special offer, or improving user interaction.
Platforms like Picreel ensure popups never interrupt your viewer’s experience. Take the time to customize your Netlify popup with advanced targeting and design capabilities to see improvements in conversions and user engagement.
And you don’t even need to spend anything. Surprised?
Picreel offers a free plan with all premium features for small businesses. If you want to scale up in the future, you’ll just need to pay $9.99 per month.
FREE. All Features. FOREVER!
Try our Forever FREE account with all premium features!