I’ve been using ClickFunnels for a while now, and let me tell you, it has helped my business in more than one way.
From landing pages to sales funnels, it’s got everything I need. Recently, I started hearing a lot about popups—specifically, how they can drastically improve email sign-ups and boost click-through rates (CTR).
Naturally, my next question was: Can I create effective popups directly within ClickFunnels?
Good news: ClickFunnels does indeed offer popups! In fact, I experimented with one, and it looked great.
With some more digging, I figured out two primary methods for creating popups in ClickFunnels:
- Using ClickFunnels’ built-in popup tool
- Using a dedicated popup tool like Picreel
So, which is the better option? This guide will explore that question. But first, let’s compare the two methods: ClickFunnels popup and Picreel.
| Criteria | ClickFunnels Popup | Picreel Popup |
|---|---|---|
| Multi-platform support | ❌ Works only within ClickFunnels | ✅ Works across multiple platforms, including WordPress, Shopify, and more |
| More features | ❌ Basic popup options (exit-intent, timed popups) | ✅ Advanced popup features (A/B testing, scroll triggers, behavioral targeting) |
| Better customization options | ❌ Limited templates and design flexibility | ✅ Highly customizable popups with detailed targeting options (exit intent, scroll percentage, referral source) |
| Integrates with various website platforms | ❌ Native integration with ClickFunnels pages | ✅ Integrates with most website platforms via HTML or plugins |
| Advanced targeting options | ❌ Basic targeting based on URL parameters | ✅ Granular targeting options based on behavior, geolocation, device type, and more |
As you can see, Picreel offers some clear advantages over ClickFunnels’ native popup feature. In my opinion, these are the top reasons:
- Cross-Platform Flexibility: With Picreel, I’m not limited to just ClickFunnels. I can create popups for WordPress, Shopify, and other platforms, which is a huge plus for any business owner managing multiple websites.
- Advanced Targeting: Picreel’s advanced targeting capabilities allow you to fine-tune who sees your popups, which can lead to better conversion rates.
- Greater Customization Options: Picreel offers more advanced design flexibility, allowing me to craft popups that align perfectly with my brand’s aesthetic.
Regardless, in this blog, I’ll help you understand both – how to create a popup in ClickFunnels as well as in Picreel.
Let’s get started.
Method 1: Using ClickFunnels’ Built-in Popup Tool
ClickFunnels makes it incredibly easy to create and deploy popups directly within the platform. Here’s how you can do it step by step:
Step 1: Create or Edit a Funnel Page
Log into your ClickFunnels account and open the funnel to which you want to add a popup.
If you don’t have a funnel, you can create a new one by selecting the appropriate funnel type (e.g., Lead Capture, Sales Page).
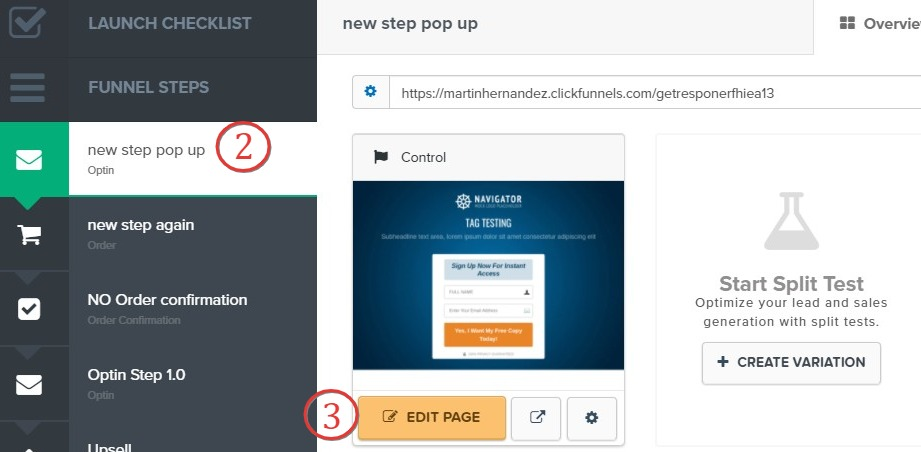
Step 2: Edit the Funnel Step
Click on “Edit Page” to open the ClickFunnels page editor. Once you’re in the funnel editor, choose the page where you want the popup to appear.
Step 3: Access Popup Settings
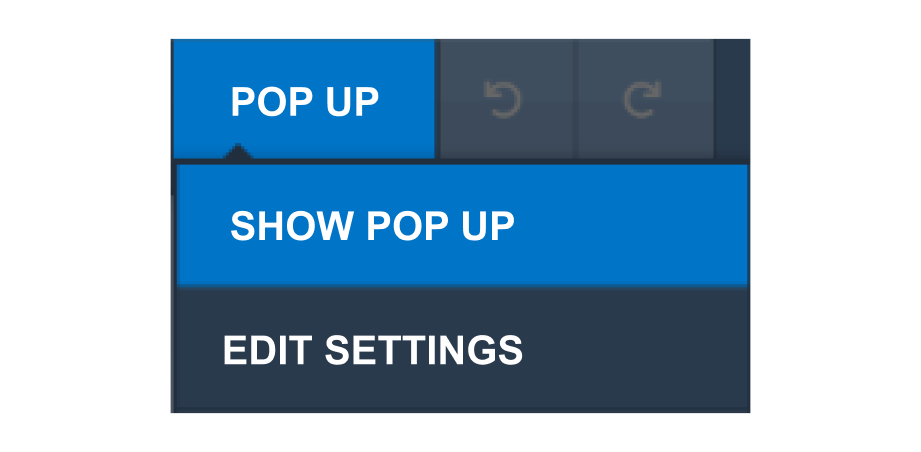
In the page editor, click on the “Settings” menu at the top of the screen, and then select “Pop Up” from the dropdown menu. This will reveal the popup settings for your page.
Click on “Show Pop Up” and proceed to the next step.
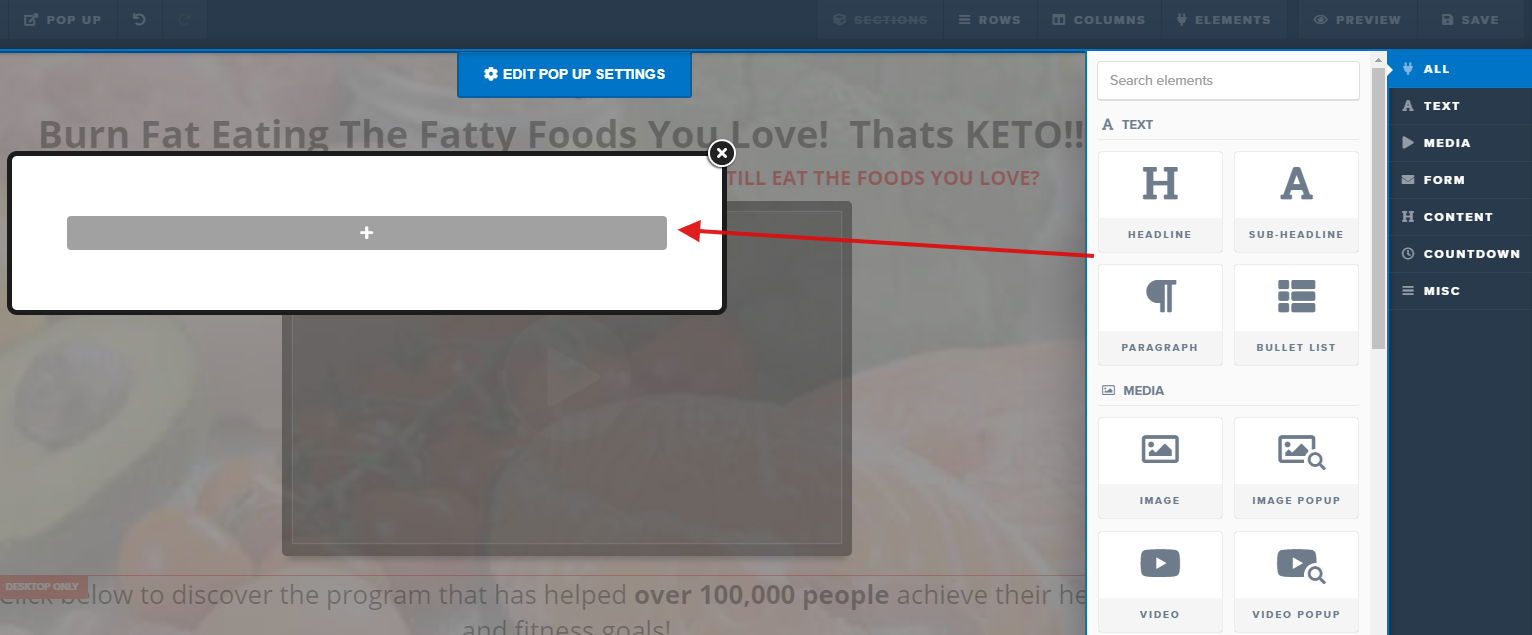
Step 4: Customize Your Popup
Once you’ve activated the popup, you can start customizing it. ClickFunnels gives you several options to adjust the layout, add elements (like text, images, and buttons), and set display triggers.
Step 5: Configure Popup Triggers
Under the “Settings” menu, click on “Edit Pop Up Settings.”

Set when the popup will appear—this can be triggered by clicking a button after a specific amount of time or when the user scrolls to a certain point on the page.
Step 6: Save & Preview
Once you’re happy with your popup, make sure to save your work. You can preview your popup by clicking the “Preview” button in the editor to see how it will appear to visitors.

That’s all. You can now publish the popup, and it will go live.
Method 2: Using Picreel Popup Builder
Now, if you’re looking for more advanced features and cross-platform flexibility, Picreel is the way to go. It’s a powerful popup builder that offers advanced features like exit-intent technology, mobile popups, A/B testing, and more.
Here’s a step-by-step guide on how to create popups using Picreel.
Step 1: Sign up for Picreel
If you haven’t already, sign up for an account on Picreel. They offer a free trial, which is great for testing the platform before committing to a subscription.
Step 2: Create a New Popup
Once logged in, go to the “Campaigns” menu and click “+ New Campaign.”
Picreel will walk you through the setup process. You can choose from a variety of templates or start from scratch.
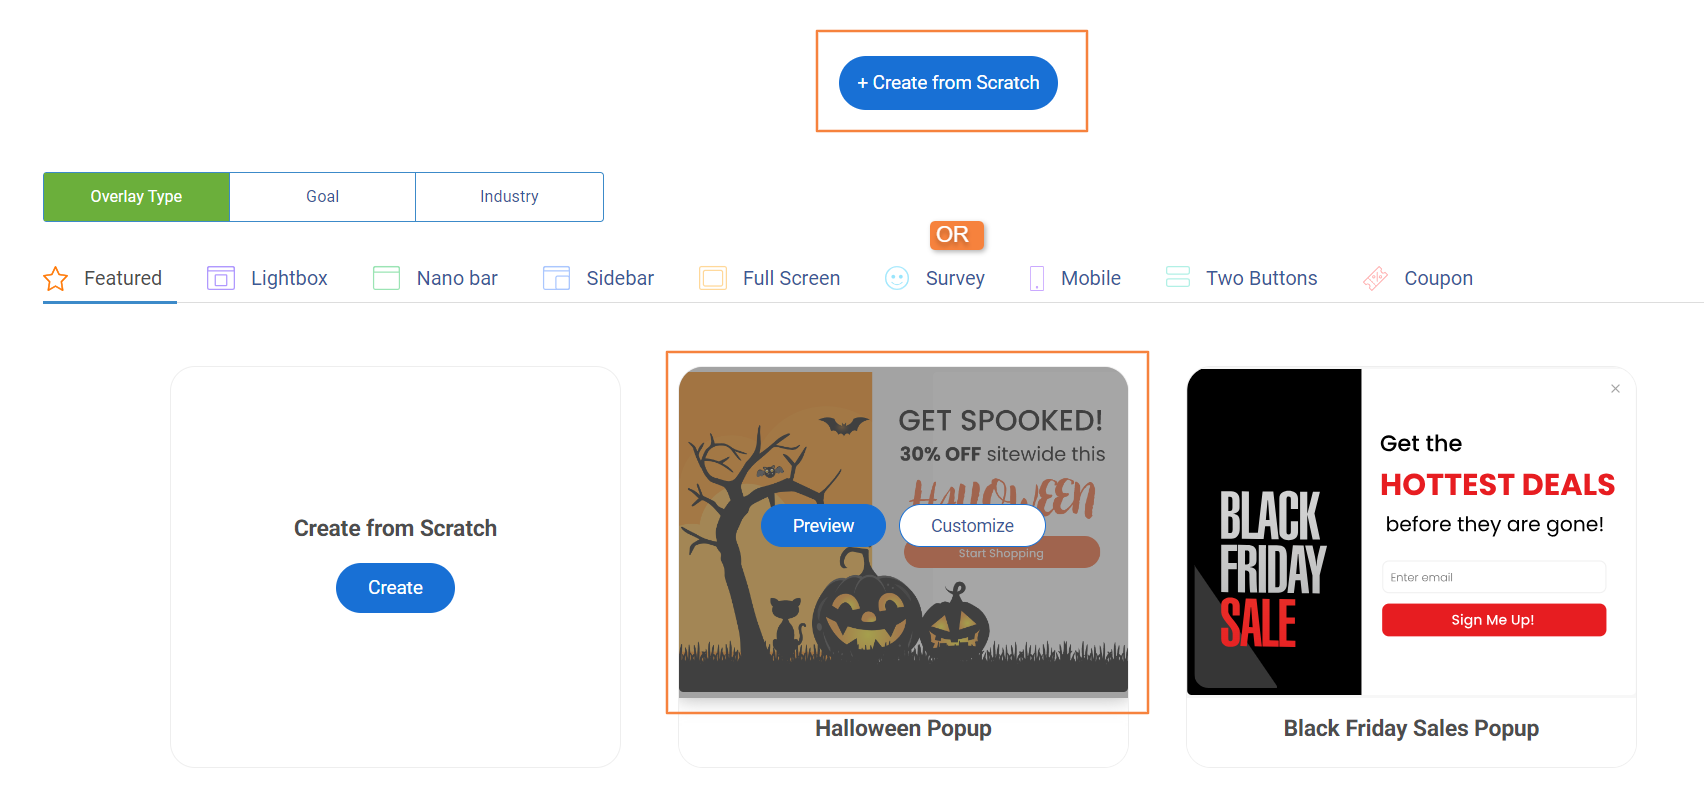
These templates are fully customizable – you can change the text, colors, images, and more to match your branding.
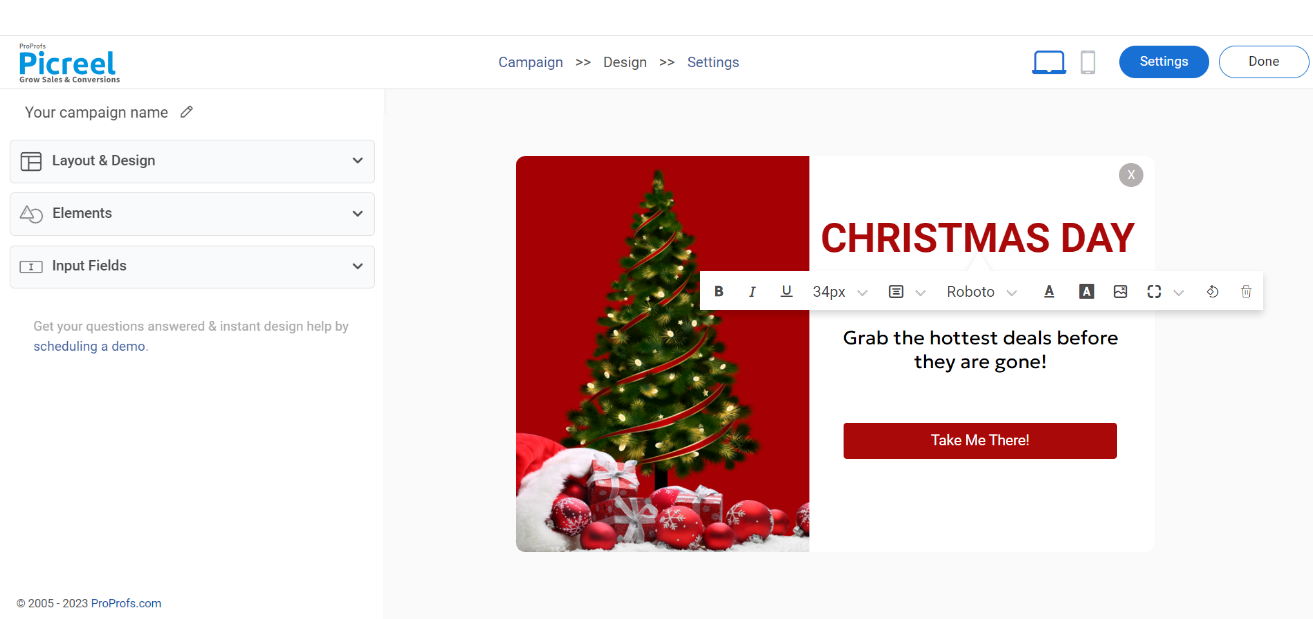
Step 3: Customize Your Popup
After selecting a template, you can fully customize your popup. Picreel’s design editor is more advanced than ClickFunnels’ native editor.
It lets you tweak every detail, including fonts, colors, images, and animations, and even set up A/B tests to see which popup design performs best.
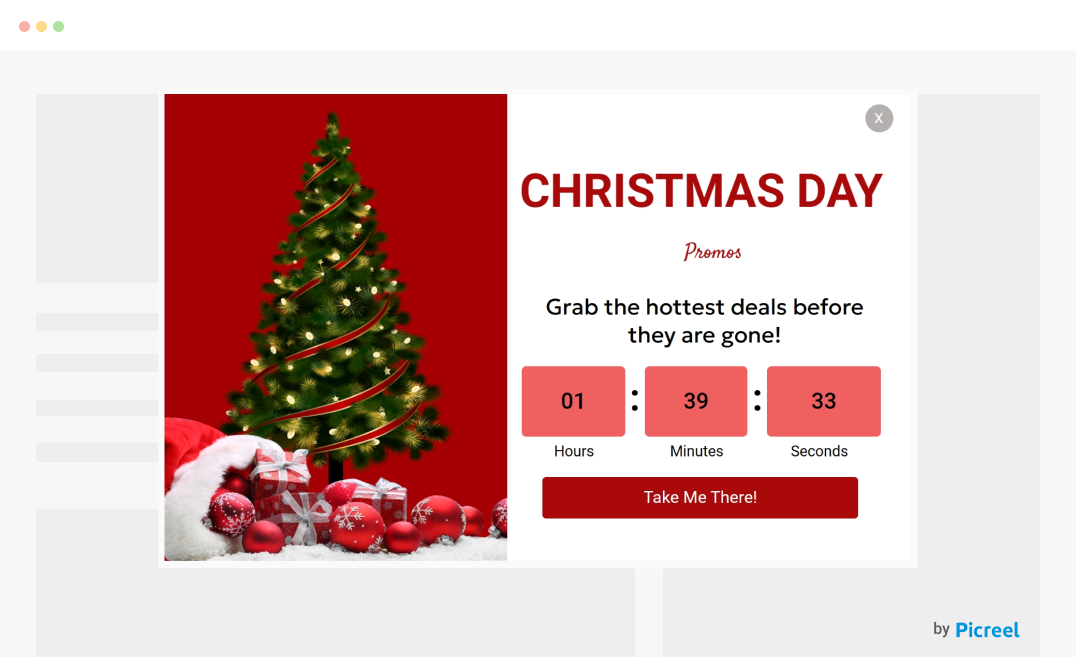
Advanced Features: Picreel also lets you add dynamic elements like countdown timers and custom CTAs (call-to-action). These small touches can significantly improve engagement.
Step 4: Set up Targeting Options
Next, set up the targeting options for your popup. You can trigger popups based on user behavior (e.g., exit intent, time on page, or scroll percentage), location, device type, and even referral source.
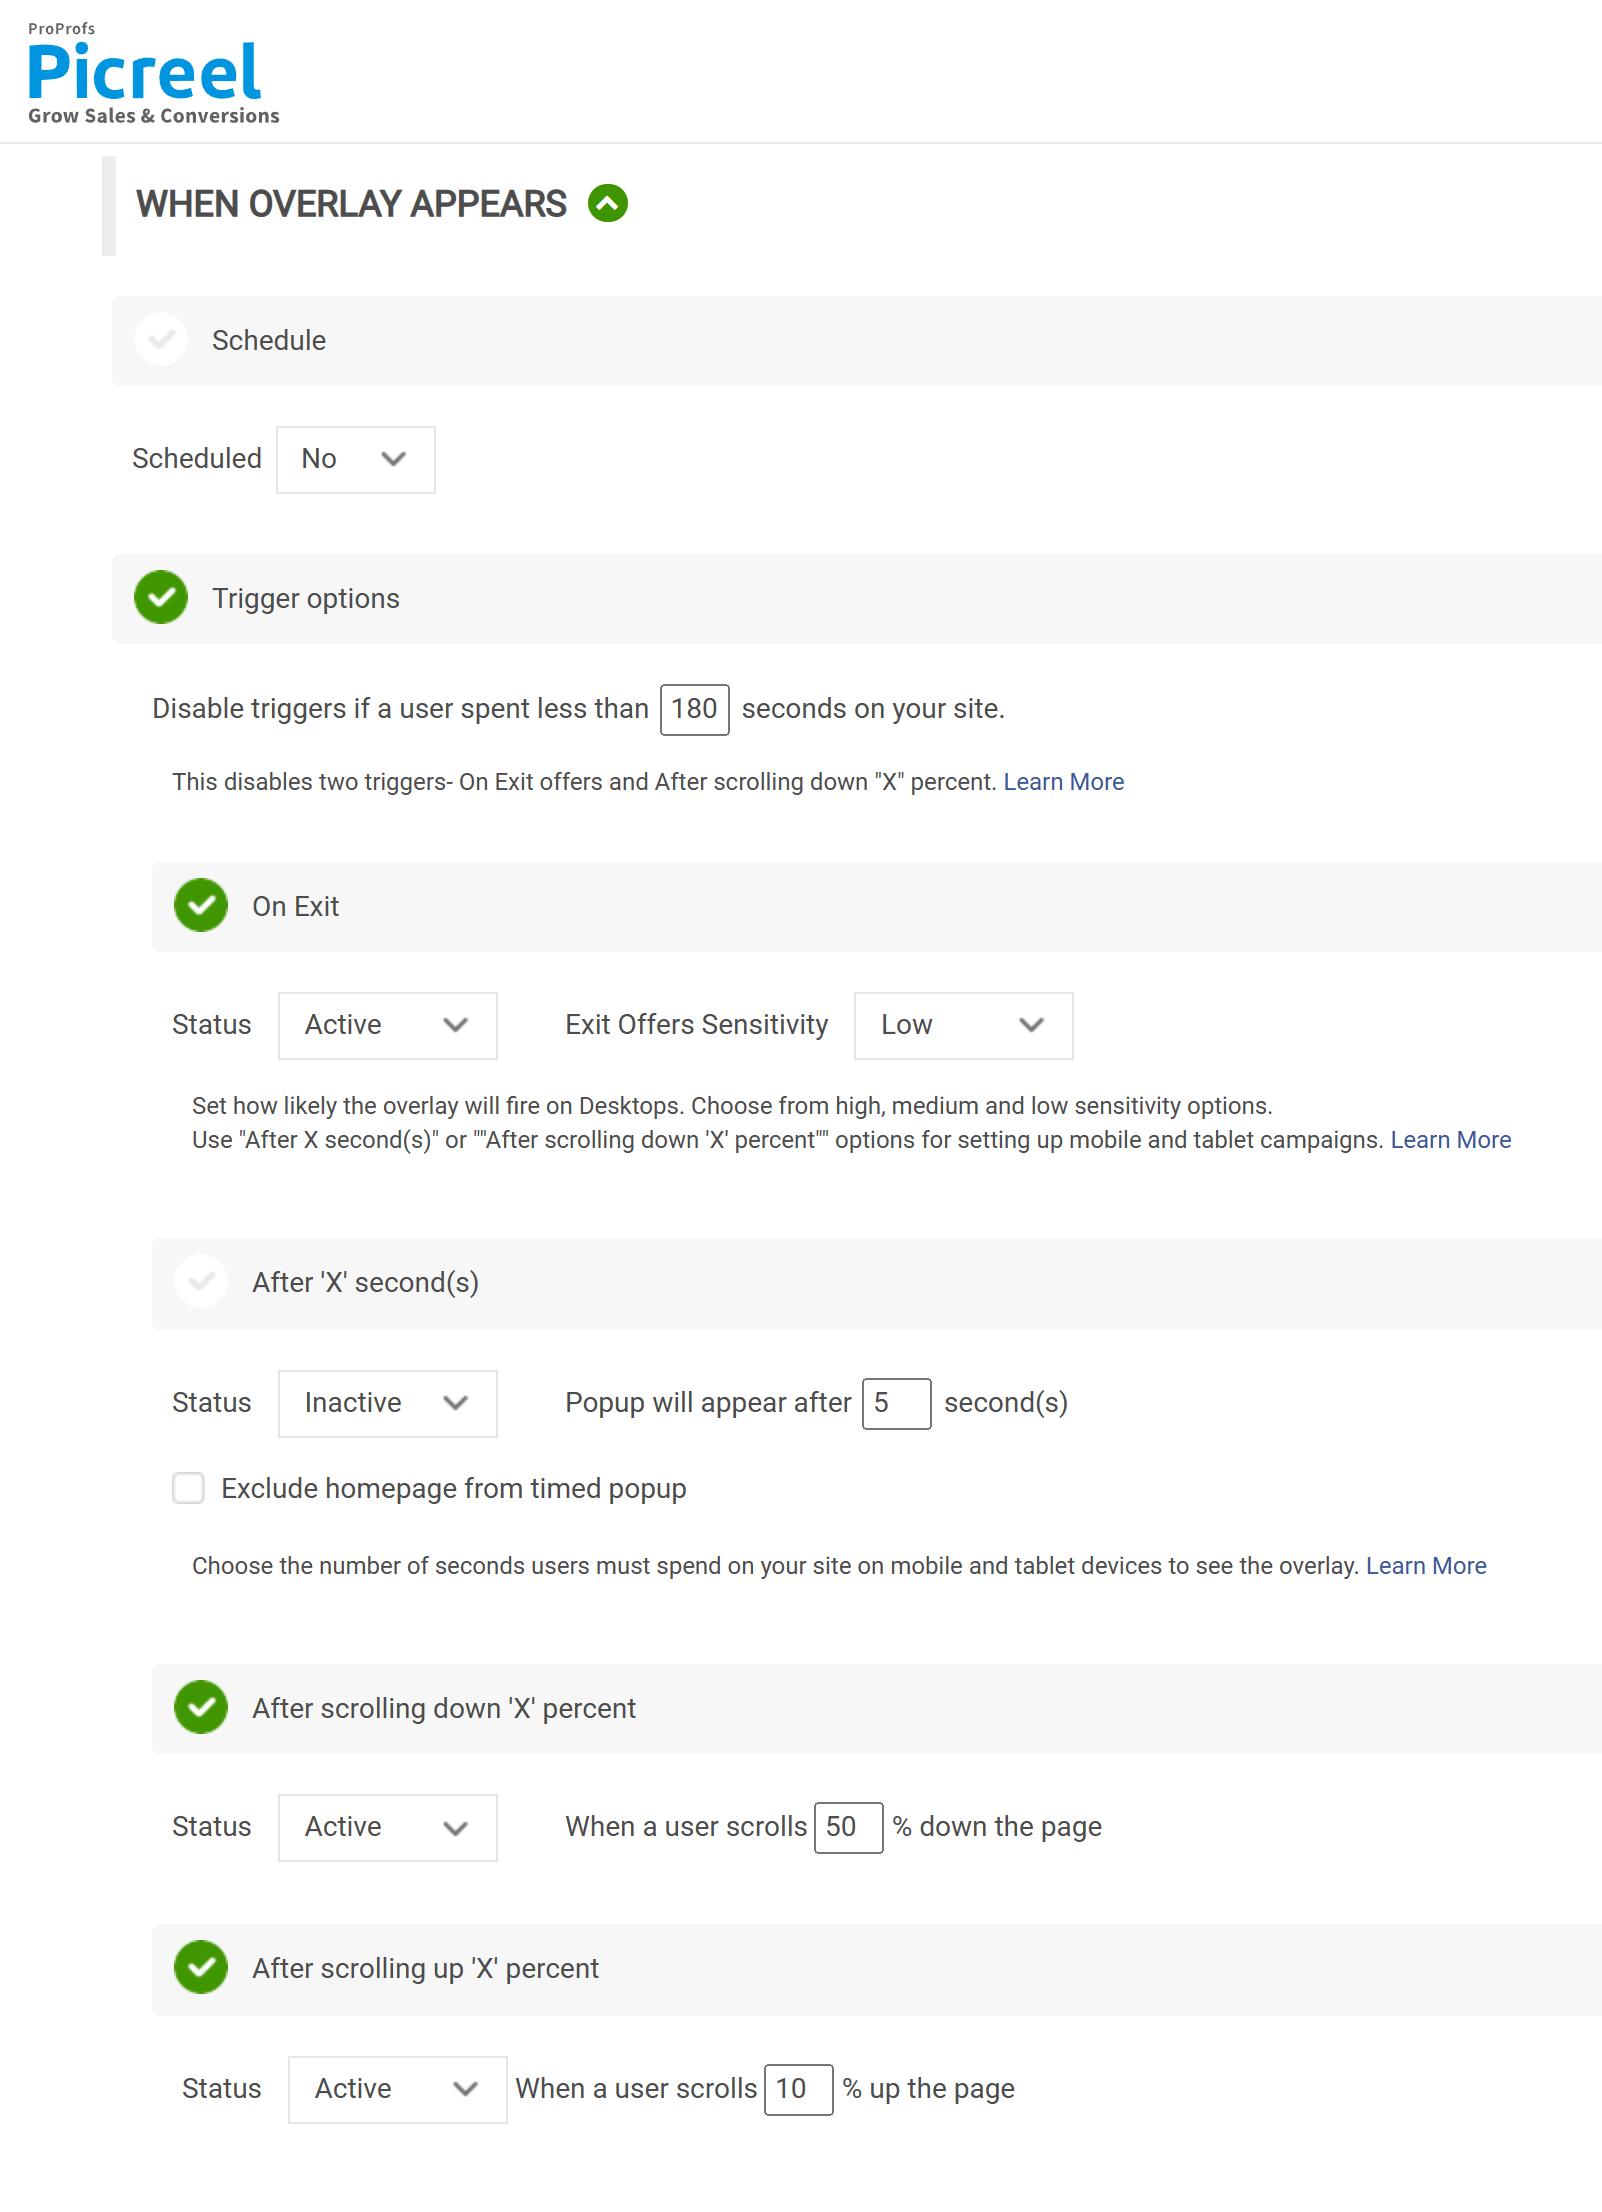
Next, click “Save,” and your popup will be activated.
Looking for a visual way to understand how each step works? Sure! Check this video –
Embed Picreel HTML Code Inside ClickFunnels
Now that you’ve configured your popup, it’s time to integrate it with ClickFunnels. I’ll share a few quick steps below –
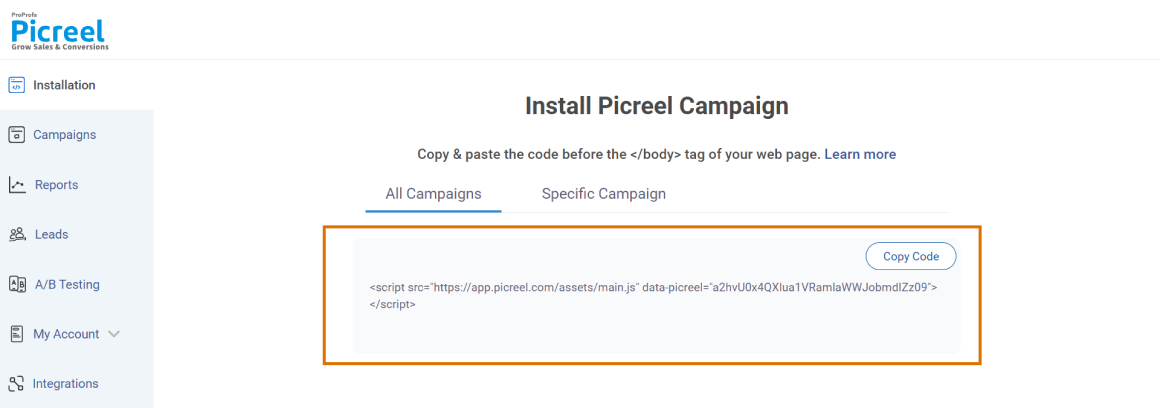
1. First, you need to navigate to “Campaigns” and then click on “View Code.”
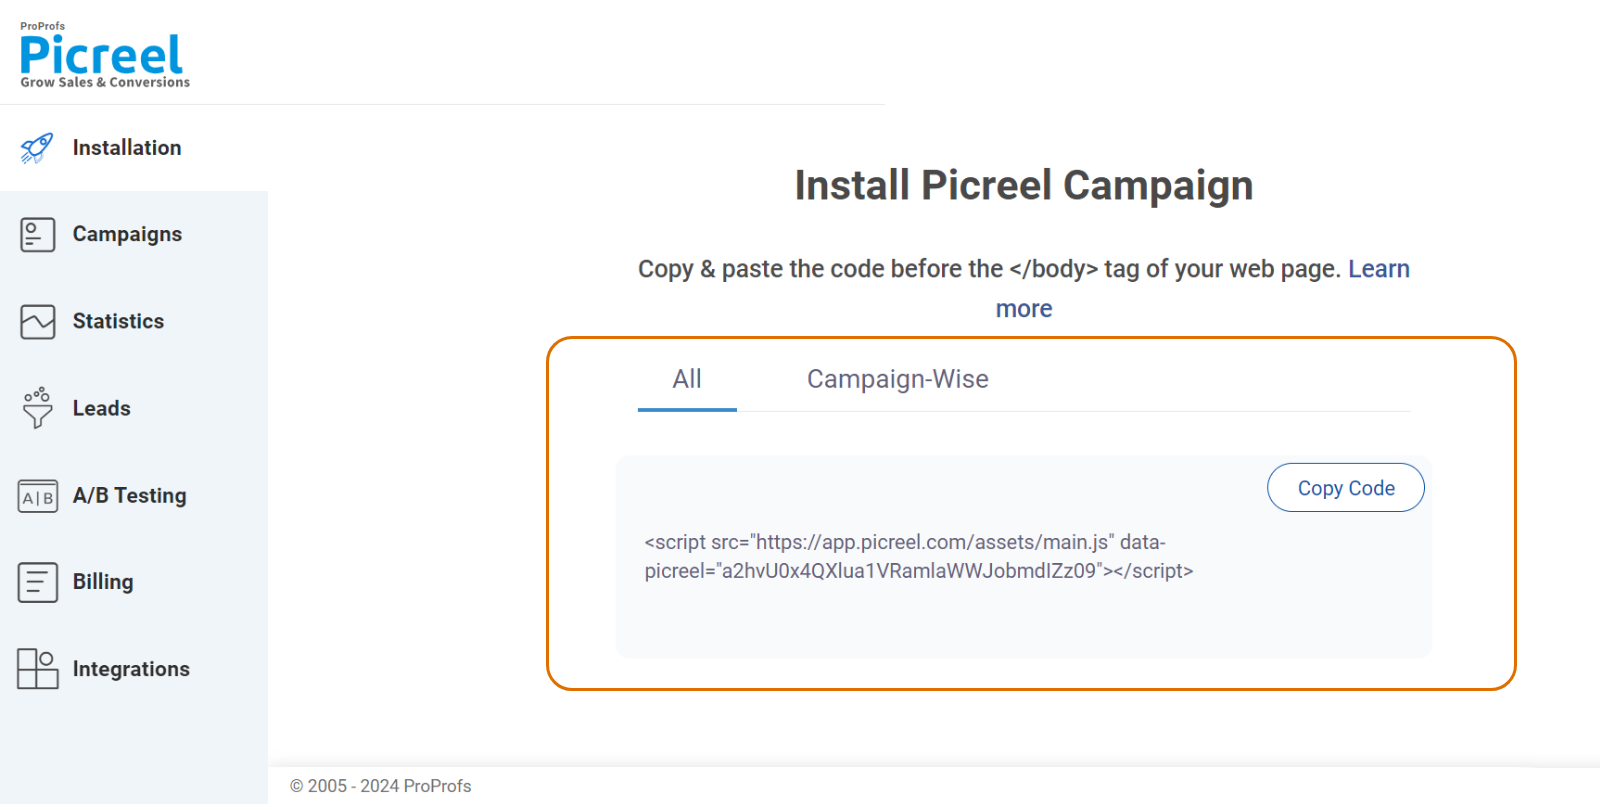
2. Next, copy the code by clicking on it. (You can also send the instructions to a tech-savvy guy in your team by clicking on “Ask a colleague to install on web”)
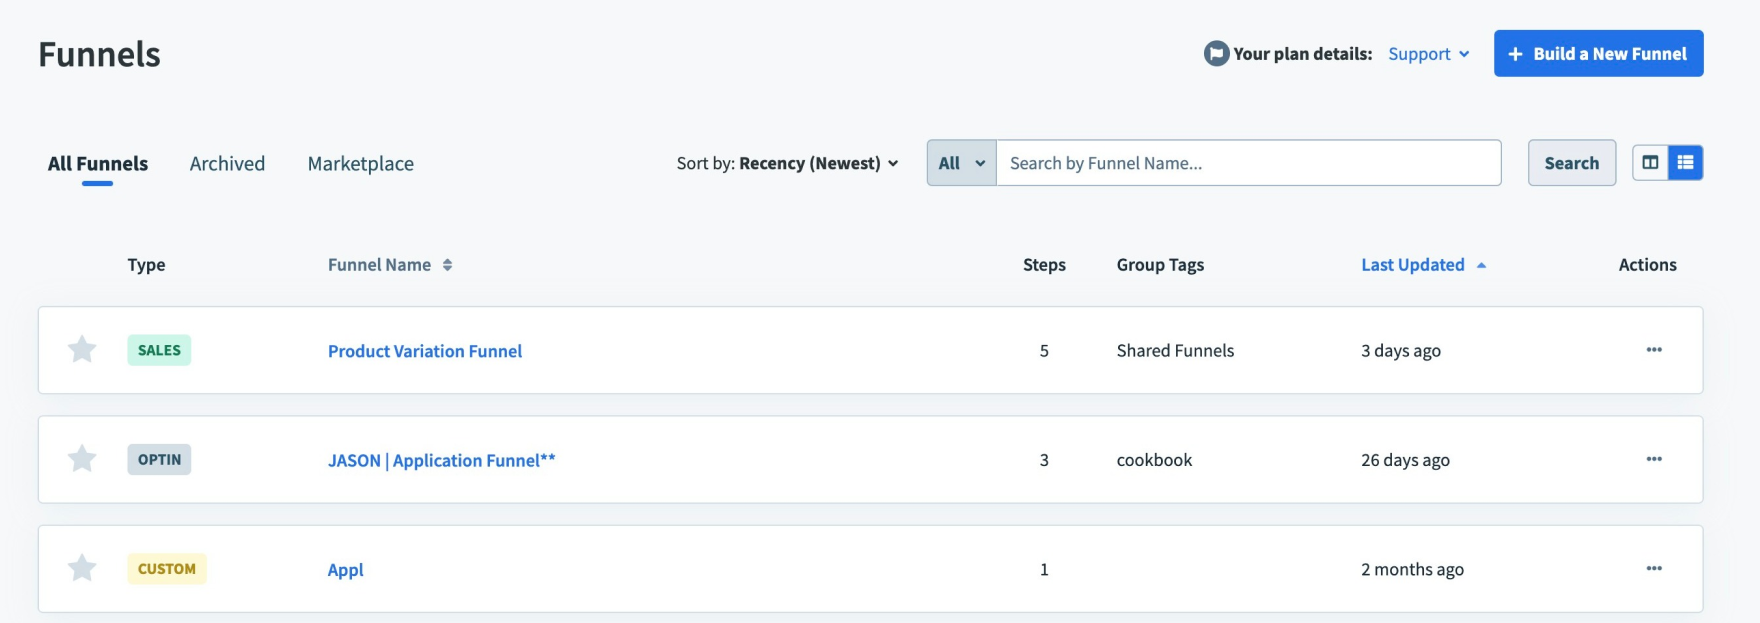
3. Now, go to your ClickFunnels dashboard and click on the “Funnels” tab in the top menu.
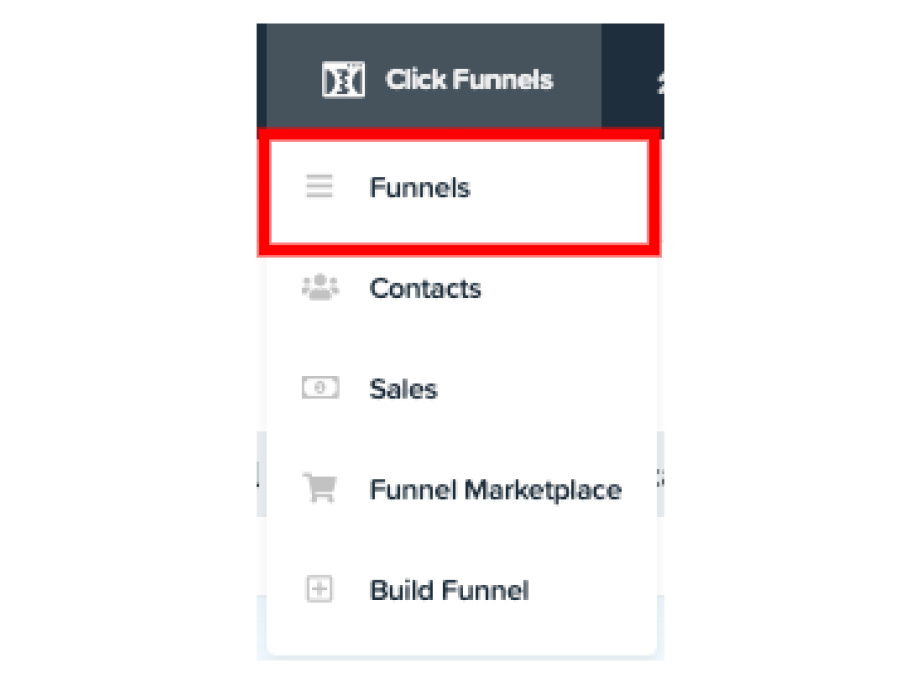
4. Select the funnel where you want to add the Picreel popup. Choose the specific funnel step (i.e., page) where you want the popup to appear.

5. Click on the “Edit Page” button next to the funnel step you selected. This will open the ClickFunnels page editor, where you can modify the design and elements of your page.

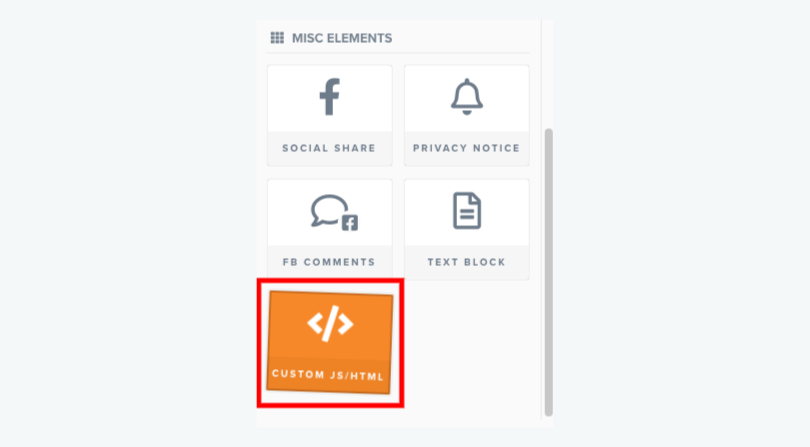
6. Once in the page editor, look at the right-hand sidebar, where you can add elements to your page. Scroll through the list of elements until you find the “Custom JS/HTML” element. Click on it to add this element to your page.
Pro Tip: You can place the custom HTML element anywhere on your page, but ideally, it should be positioned in a way that doesn’t interfere with your main content. This location will depend on where you want the Picreel popup to trigger.
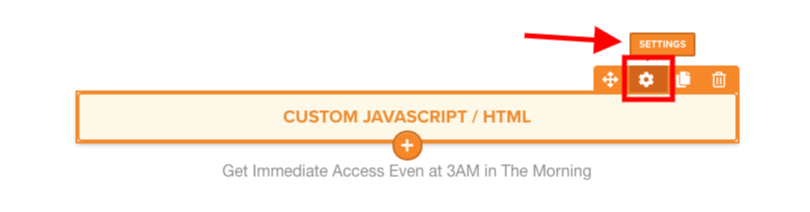
7. Hover over the newly added element and click on the “⚙️” icon to open its settings. You’ll see a window where you can enter your custom code.
8. Click on the “Open Code Editor” button and paste the HTML/JavaScript code generated from Picreel.
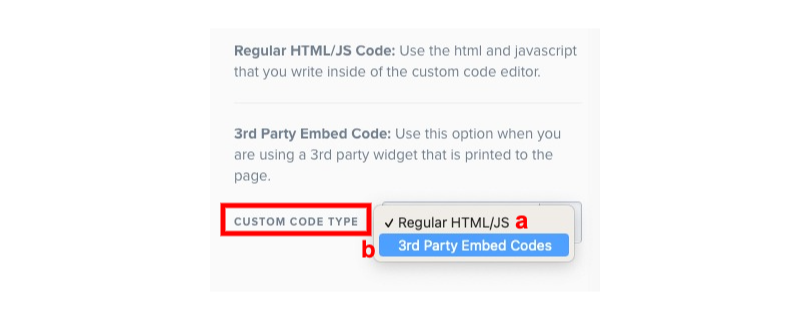
9. Next, you need to choose the code type from the “Custom Code Type” drop-down menu. Here, select “3rd Party Embed Codes.”
10. All done! You can modify the popup per requirements and preview and save it before publishing.
Which Is a Better Method: Method 1 or 2?
From a long-term perspective, I believe Picreel is the better option. The ability to carry your popups with you if you ever switch platforms is invaluable. Plus, the advanced features give you more opportunities to engage and convert your visitors.
And on top of that, you don’t even need to shell out anything. Picreel’s free plan comes with all premium features. Even if you want to scale up in the future, you’ll just need to pay $9.99 per month.
As for ClickFunnels popups, they surely don’t come without additional costs, but be aware that the customization and targeting options are pretty limited.
Ultimately, the choice is yours. If you’re ready to take conversions to the next level, give Picreel a try. But if you’re happy with the basics, ClickFunnels has you covered.
 Tips
Tips
We’d love to hear your tips & suggestions on this article!
FREE. All Features. FOREVER!
Try our Forever FREE account with all premium features!
 We'd love your feedback!
What did you like & how can we make it even better?
 Thanks for your feedback!
 Ask Your Question
Have a question? Get expert help to make your decision easier.